Category: Bomarc – Ellsworth Maine

Spring in Maine brings joy. Finally it’s time to clean up from the winter, trim the apple trees, plant your garden and do some hiking, camping or fishing. Spending time outside refreshing your soul. Suddenly another Spring reality strikes when you find a tick crawling on you or attached to your body. The tick population has exploded over the last few years. One of the reasons may be we have moved away from burning fields, which kills ticks, coupled with the increased population of host animals like deer, mice, rats, and squirrels. More ticks are finding their host animals easily, therefore laying more eggs. Nature provides some natural predators to help control ticks like guinea fowl, chickens, turkeys, opossums and ducks. What if you don’t have these around or can’t keep them because you rent. What can you do to feel safer outside?
The number one thing is to start is a tick protocol every time you venture outside. The best protocol starts before you go outside with treating your exposed skin and clothing with a repellent. Following are some natural, simple, safe and effective ways you can protect yourself from tick bites and the bacterial or protozoan infections that cause the diseases and co infections associated with a tick bite. Not every tick is a carrier of these diseases or co infections but the best practice is to treat every tick bite like the tick has a disease.
Tick Killer/Repellent #1: CEDAR OIL
The most effective choice is cedar oil. Cedar oil is non toxic to humans and pets. The same can’t be said for its use on ticks! Cedar oil is a natural insect and tick killer or repellent. This oil can be sprayed directly on your skin and clothing. You can treat your yard with a dilution of this oil but be aware it does kill ants, crickets, roaches, chiggers, mosquitos and japanese beetles and many more insects. It is safe for butterflies and bees! Cedar oil is safe for your pets and can be purchased at most pet stores.
Tick Repellent #2: ORGANIC NEEM OIL
Organic neem oil can be rubbed directly onto your skin. Use several drops in the palm of your hand, rub your hands together and then spread the oil on any exposed skin. You can mix the neem oil with an almond oil or other light carrier oil to dilute it. In it’s diluted state it is safe to use on your dog. DO NOT treat your cat with neem oil. There is a recipe for a pet safe spray you can use on your cat included near the bottom of this article. Optional spray you can make using Neem oil if you prefer this method of application:
- 2 cups of water
- 2 tablespoon of Neem oil
- 4 tablespoon of apple cider vinegar
- Mix together in a spray bottle, shake well before use and spray on clothing and exposed skin. This solution is great to use on dogs as well. Be sure to label your spray bottle with the ingredients!
DIY tick sprays are very effective at repelling ticks. What makes them effective? Ticks dislike certain scents. All those scents are available in organic essential oils. Therefore, making solutions using one or any combination of these scents is a great way to repel ticks. The scents most repugnant to ticks are peppermint, lavender, cinnamon, orange, rose geranium and lemon or lemongrass. These scents can also be used with a light carrier oil like almond oil, avocado oil, coconut oil, jojoba, olive or sunflower oil. Mix them well and rub onto your skin. It is recommended to use 100% organic essential oils for making your tick repellent solutions.
DIY Tick Solution # 1: ESSENTIAL OIL SPRAY
- 4 oz Water
- 20 drops of Lemongrass essential oil
- 20 drops of Eucalyptus essential oil
Add all the ingredients to a small spray bottle and mix well, label the spray bottle. Shake well before every use, spray your exposed skin and shoes, socks, pants or other clothing as desired. Store in a cool dark place to maintain the efficacy of your solution. This solution is suitable for use on children, adults and dogs.
DIY Tick Solution #2: ESSENTIAL OIL SPRAY
- 4 oz water
- 20 drops of Rose Geranium essential oil
Mix in a spray bottle, label with ingredients before storage. Shake well before use and enjoy the great scent. Can be sprayed on skin and clothing, has an added benefit of antimicrobial and antibacterial properties. Store in a cool dark place. BONUS: can be used to treat acne!
DIY Tick Solution #3: ESSENTIAL OIL SPRAY
- 4 oz water
- 20 drops of Eucalyptus essential oil
Mix in a small spray bottle, shake well before use. Spray exposed skin and clothing before going outside. This solution is safe for dogs as well but only in this diluted state. Never use straight eucalyptus oil on your dog. As with all DIY sprays label the bottle before storage and keep in a cool dark place to maintain the effectiveness of the essential oils.
DIY Tick Solution #4: ESSENTIAL OIL LOTION
If you would rather have an oil based body lotion try this nice combination for insect and tick repellent. Choose your favorite carrier oil, jojoba, olive, sunflower, coconut or almond oil to use in this recipe.
- 1 Tablespoon of light carrier oil
- 6 drops of Tea Tree essential oil
- 6 drops of peppermint essential oil
- 9 drops of citronella essential oil
Mix well and spread lightly onto your skin. Take the remaining mixture and put in a little bottle to take with you for reapplication if needed. Any one of the above solutions will work to repel or in the case of the cedar oil kill the pesky disease carrying ticks.
DIY Tick and Flea Solution for Pets (including cats)
- ½ teaspoon of baking soda
- ½ teaspoon of salt
Mix these two ingredients together in a large spray bottle then add the following ingredients. There will be a foaming reaction so slowly add the wet ingredients while holding the bottle over a sink.
- 8 oz of apple cider vinegar
- 4 oz of warm water
After the foaming reaction subsides spray on pets avoiding the face and eyes. If you want to treat their faces, spray solution onto your hands and gently rub into their fur. Spray your pets body with this solution and then rub into fur down to their skin. This solution can be used on their bedding and throughout the house to treat for ticks and fleas. Retreat on a regular two week cycle during the flea and tick season.
PRO TIP: If you own a lint roller use on your body before entering your house. The sticky paper will pull the tick off your clothes preventing infestation of your home. Keep one in your car to use after hiking or working away from home.
Go wild with your essential oils and combos, try cinnamon and orange or lavender and peppermint, lemon or lemongrass with cinnamon, be adventurous with your scents. No reason tick repellent can’t smell great! If you forget and need to purchase an OTC spray use Ben’s Tick Repellent Spray. It works great but avoid getting it on your skin.
The next step in tick protocol is when you return home. Remove all your clothing and put them immediately into the washing machine. Washing does not kill the ticks but drying them will dehydrate them, preventing an accidental infestation of your home. Take a hot shower and check yourself all over paying close attention to your legs, head, arm pits, mid section including your groin as these are favorite spots for ticks to attach. Slowly run your hands over your body feeling for hard bumps, even tiny ones as the tick nymph are small.
What to do if you find one attached:
- Use a tick removal tool kit, (spoon or key type) Don’t have one? Follow these steps.
- Use fine point tweezers to grasp the tick as close to the skin as possible
- Gently pull straight up ~ Do not twist or jerk the tick
- Do NOT crush the tick between your fingers (bodily fluids carry any diseases)
- Wash the wound and follow with peroxide or alcohol to disinfect
- If the head of the tick is left in the skin do not dig it out. If it can be easily extracted with tweezers without crushing the head, remove it. If not, leave it and let your body take care of it or go to your doctor for proper extraction.
- Capture tick in a zip lock baggie (do not tape or use alcohol to kill the tick if you are having it tested)
- Write in permanent marker on the bag date: time: location on body: location where tick was picked up : Activity during this time
- If in Maine follow this link to have the tick identified and tested https://extension.umaine.edu/ticks/submit/
- Watch the bite site for a rash, bullseye ring or for fever for several weeks
- Call your doctor immediately if you develop any rash or fever.
Arm yourself with knowledge in the war against ticks. Know what works to repel or kill them, and how to properly remove them if they do make it past your defenses. Don’t let ticks prevent you from enjoying the great outdoors!
Have you considered moving, like an entire interstate relocation and change of city process? Even if you haven’t considered it, it could happen anytime. According to the United States Census Bureau, an approximated number of 31 million Americans move each year, and as much as 3 million, move interstate.
Various reasons can prompt the need to move out of state. These reasons may include the need for a fresh start in life, an office promotion, traveling for further education, moving in with a partner in a different city, or the loss of a loved one resulting in the need to sell off property as soon as possible to trusted house buyers.
Whatever the reason may be, the easiest part of moving out of state is “the decision” to move. Every other part of the process is challenging and has some concerns associated with it.
Some of these challenges include:
Leaving all previous experiences, friends, and family
This process is not an easy one. From the moment you announce your possible move out of state, even for new and exciting opportunities, the gloom sets in. Subconscious sadness and a wild attempt to adjust to the reality of living without family and friends, with whom you have created amazing memories, becomes a daily routine. This does not mean you will not move, you will, probably amidst tears.
The cost of moving out of state
Moving out of state costs a lot of money. If you have lived in your current city for a long time you may have accumulated a lot of belongings. These belongings may include presents from all forms of celebrations, the spur of the moment purchases you never used, and the non-essentials needed for daily comfort.
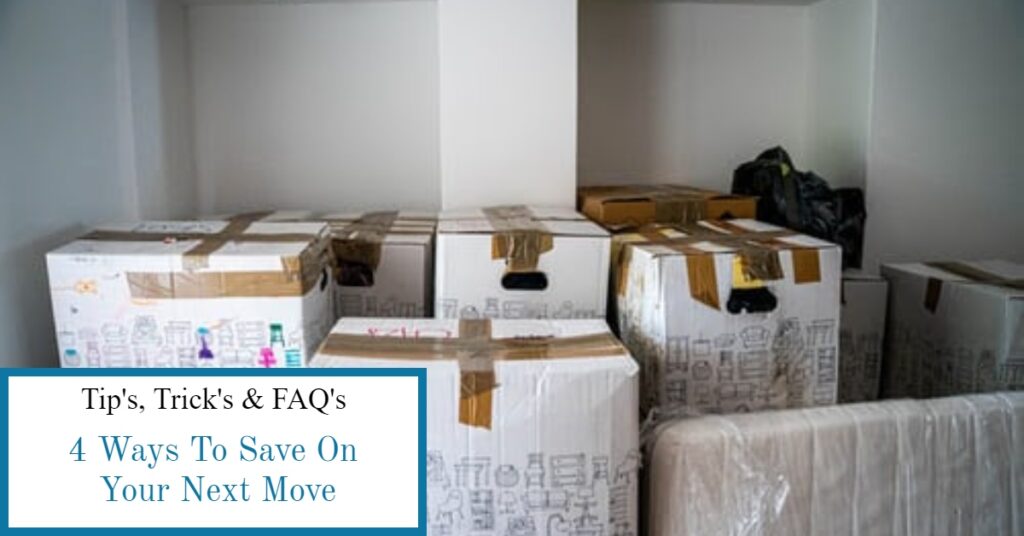
If you have to move with all of these belongings, you are going to need a truck or a mover, and the larger the truck, the greater your expense, amidst other payments. The estimated average cost for an interstate move is $4,800. That is an amount you may be concerned about spending. However, there are easy and effective ways to save money on your next move out of state, whenever that may be.
Four Ways To Save Money When Moving Out Of State
Tip #1 Rid yourself of sentiment. Don’t move what you don’t need.
This may be a good time to make some extra cash, you are moving to a new state and need all the money you can get. How about creating a note, honestly taking into consideration every belonging you own? Yes, you may need to sell off some of them.
The television set no one ever used, the worn-out favorite couch from a decade ago, the grand piano your mum loved greatly which no one plays it anymore since her death, bulky electronics and furniture, the list should be as exhaustive as possible. What do you have on that list which you haven’t used in a year? This is a tough decision, but to save money, you need to get rid of them.
Don’t move what you don’t need. You can sell them off locally at garage sales, list them online using apps or on local social media communities, and for those items that you love dearly, you can offer them as gifts to friends and family who need them. With this, now you have the essentials left.
Tip #2 Use local storage facilities.
Using a storage facility is cost-effective. Having sorted through your belongings and gone through the gruesome task of decluttering, now you have the essentials—properties and belongings you have to keep. Some of these belongings may not be needed for immediate use. If you can live without them for a while then maybe you should opt for an affordable and safe storage facility. This will save you the stress, time, energy, and money required to move everything across the state.
The average standard storage unit rent costs $60 to $180. Additionally, you can save more money by taking appropriate measurements of your fixtures’ dimensions, especially the furniture, and running the measurement by the unit estimator to ensure you pay for the right unit size. Also, you get to choose favorable conditions for the storage of your items—climate controlled or non-climate controlled, anything to keep your items safe.
Tip #3 Do some local search to source storage boxes.
When moving, you don’t need to buy new storage boxes. Some open conversations in your neighborhood, physically or in online communities requesting storage boxes can get you all the storage boxes you need. Even if you don’t get them completely free, you can get them at heavily discounted rates. However, as much as you can, try to fit your items into equal-sized boxes. This ensures that the boxes can be packed properly without tipping, whether they are moved miles across the state or moved to a local storage facility for safety.
Tip #4 Call in favors from friends and family.
What do you have left to move across the state? Can your friends and family help you move them? If all you have left are easy fixtures and properly packed storage boxes, then you may call in your friends and family to help you move.
Instead of paying professional movers, you get to buy boxes of pizza, have a merry inter-state trip, and also get a new company on arrival at your new house. While this is a great tip, you need to consider how far your new location is, and also ensure that your friends/family can move whatever items you have efficiently to this new location.
Moving out of state is not an easy task, there will be various challenges and unbudgeted expenses before, during, and possibly after moving. Consider all your options meticulously and explore all possible ways to save money, you will need the extra cash at your new location.
Try to avoid moving during the busy or peak travel period, it will save you some money. Even if you have to move during a busy period, if you don’t have to move everything at the same time, you can opt for a storage facility, keep your belongings in a safe unit and move them at a convenient time.
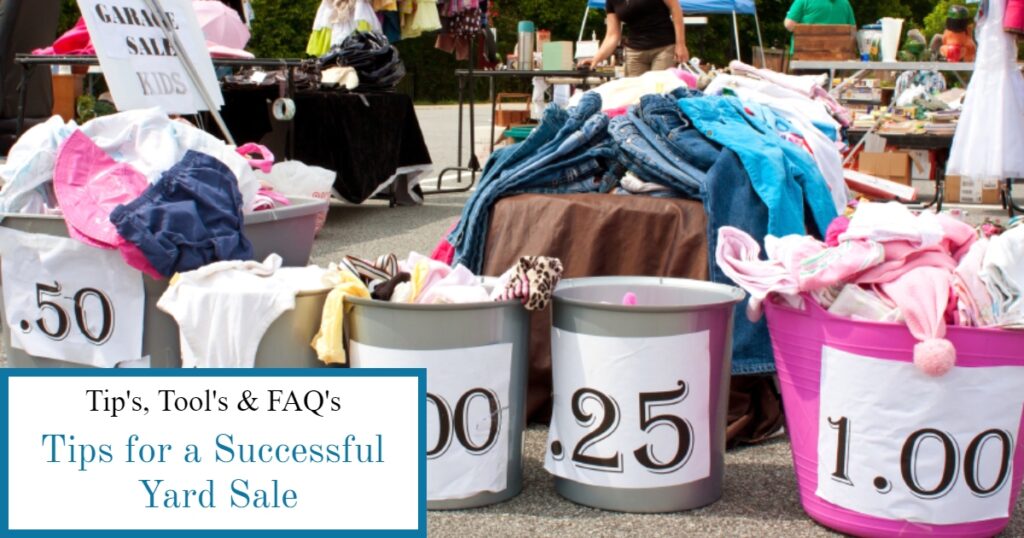
Tips for a Successful Yard Sale
The official start of Spring is in March but in Maine Spring begins for most with the first yard sale. Yard sales are a favorite hobby of the avid bargain hunter. Hosting a successful yard sale is a lucrative event. Successful yard sales take planning and organization, so having a clear plan of action can greatly reduce the stress and extra work associated with a yard sale. There is a huge difference between a well planned yard sale and one thrown together at the last minute. It’s evident the second you walk into the yard. Rows of neatly laid out items, clearly marked with prices as opposed to piles of things heaped on the lawn with no tags. It’s definitely worth the time and effort to plan and organize your sale. Most people will walk away from the heaps of items piled on the lawn. Tips for planning a successful yard sale are below.
If this is your first time hosting a yard sale take a little time and think about the yard sales you have been to. Were the items displayed in a pleasing manner, how were things tagged, what did the signage look like. These clues can help you plan your yard sale with a few extra tips listed below.
Planning Tip:
Plan far in advance. Choose a date and stick to it. Decide if it’s going to be a one day deal or a two day event, typically 2 day events are more successful. This will help you break down the list of things that need to be done in a timeline. The timeline will help you keep on track and make sure you aren’t rushing at the last minute to complete tasks that could have been done weeks or months ago for a smoother sale. This is what a typical timeline could look like.
January/February: Declutter the house and sort sale items, donation items into bins. Throw out the other things that no longer have a use. Arrange to donate the items sorted to appropriate organizations.
March: Clean, wash and repair all the items for the yard sale. Organize them into boxes or totes to keep them organized. Price the items that need to be priced. PRO TIP: Sort into categories to make set up at your sale easier. Label the totes with the category. The Dollar Store is a great place to find inexpensive price tags or masking tape and permanent markers for pricing your yard sale goodies!
April: Research expensive items or old items for their current value. You wouldn’t want to put Aunt Betty’s 1890 painting she had hanging in her living room for $5.00 to find out it’s worth $5000.00 to a collector. Those items will require a different kind of sale to gain the best value from them. PRO TIP: Pricing can be tricky too high and no one will be interested so remember yard sales are for bargain hunters and price accordingly. It is best to keep sentimental value out of the equation when deciding on a price. For new or larger items like furniture, the best rule is 25 to 30% of the original value. For example, you purchased a table for 100.00 ten years ago and it’s still in great shape, at your yard sale the price tag should be 25 to 30 dollars and be prepared to haggle.
May: Make signs that are easy to read. Plan out your advertising. Keep it simple to gain the biggest return on your sale. Plan how your yard sale will be laid out, keeping in mind the successful yard sales you have been to before. Gather the items you need for the day of the sale: tables, chairs, cash box, cooler with lunch etc. Have an exit plan for the yard sale: a bag full for 1.00 so you have less to take down or nothing special because you plan on having another yard sale in the next weeks or months. Know ahead of time what you want so you can plan accordingly. PRO TIP: Keep your signs simple and easy to read, choose fluorescent colors to catch the eye. Keep the sign to three lines: YARD SALE, Date & Time, Location remember people will be in their cars driving by so the larger the letters the better. Also choose a stop sign or location where people will have to be going slow so they have time to read it all. If you need extra tables consider using boards and boxes to create tables. Plan on donating the left over items from your yard sale? Make arrangements now to drop off or arrange to have someone pick up your donations.
Week to several days before sale: set up tables and put up the signs in strategic locations to make people aware your sale is happening. PRO TIP: Plan the layout of your sale and have it on paper so when it’s time to set up you have a clear idea of where things will go.
2 days to the sale: start putting out things that can be protected from night time dew or rain. You can hide sealed totes under the tables making the day of the yard sale an easier set up. Have help moving big furniture pieces into place and cover them with plastic for protection. PRO TIP: This would be a great time to verify everything is clearly marked with a price. If you like to haggle you can make your yard sale a “name your price” sale but have in mind a fair price for someone who doesn’t want to haggle. Use the Dollar Store again for inexpensive plastic tablecloths or coverings.
1 day away: get balloons to add at the end of the driveway with your sign to catch people’s attention. Put out as much stuff as you feel will be protected from night time moisture to help you be more prepared for the day of the sale. Make sure you have change for sales and bags to help people take home their treasures. If you need to make signs for the fill a bag for the last hour of your sale have them ready. PRO TIP: Have help lined up to help you set up and take down the sale at the end. Set up your check out area in the shade or have a popup canopy for your protection from the sun.
Day of the sale: Make sure you have enough time before the sale starts to have everything set up. Have your cooler packed the night before with your water and lunch to save time. Place your attention-getting sale sign with the waving balloons early. Lock your house for your protection while the sale is going on. You wouldn’t want strangers wandering into your home while you were occupied with the sale. Another safety tip is to keep your coins for making change in a money box but the bills on your person. PRO TIP: Have someone lined up to come give you a quick break to use the restroom throughout the day.
This is a basic outline, it can be changed to suit your needs. Clearly planning helps keep your sale moving along and eliminating the last minute rush and stress. Ultimately the success of your yard sale rests a lot on the items you have available, the prices you have set and what your bargain hunter is looking for. Having a wide variety of items helps you appeal to a broader range of shoppers! Good Luck and Happy Yard Sale!
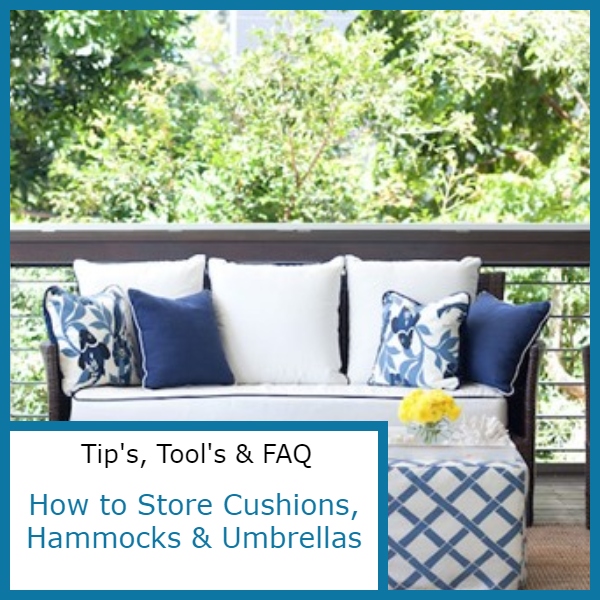
How Do You Clean and Store Patio Cushions, Hammocks and Umbrellas in Brewer, Maine?
Living in Brewer, Maine has its challenges especially when it comes to your outdoor living time. The season for patio and outdoor living in Brewer last about five months which means your patio furniture is stored appropriately seven months of the year. Ever take your patio furniture out of storage and find mold and mildew have taken up residence on your cushions, hammock or umbrella material? Preventing this phenomenon starts before putting your patio furniture in self storage. Simple cleaning tips for optimum self storage of your outdoor living investment can help prevent damage during it’s off season time.
Cushion Care:
No list of cleaning tips would be complete without discussing the cushions used to create your comfortable patio or deck space. Cushions are either removable or not. The removable cushion covers can often be washed in a washing machine with any laundry detergent. Cleaning your cushion covers by hand is the best way to give them a really deep cleaning. First remove the foam core, then remove any loose dirt by brushing the cover. Next soak the covers in a bucket of warm soapy water, then scrub with a soft bristled brush. Cleaning Tip: Scrub the inside of the cover as well, to remove stubborn or deep stains. Then rinse with clean water and allow to air dry thoroughly before reinserting the foam cores.
Non removable cushions are almost as easily cleaned. Sponge on the warm soapy water and rub to create a foamy coating on your cushions. Scrub any extra dirty spots with a soft bristled brush until the dirt is gone. Use a high pressure setting on your hose nozzle to rinse the foam and all soap residue from the cushions. Squeeze excess water from the cushions and allow them to thoroughly dry.
Cleaning tip: If your cushions already have some mold and mildew, mix a solution of 1 gallon of water, 1 cup of bleach and ¼ cup of mild detergent. Using a spray bottle, spray onto the affected area, allow to soak in for 15 minutes or so then use a soft bristled brush on the area until the mold and mildew are gone. A sponge or cloth will work equally as well to remove the mold or mildew stain. Storage tip: Place thoroughly dry cushions in plastic bags to protect them during storage. Garbage bags work great for storing cushions. Add a strong scented dryer sheet for fresh smelling cushions in the Spring plus mice dislike strong odors which will help protect your cushions from rodent damage while being stored. Keep your cushions off the floor especially if it’s a concrete floor. Moisture is the leading cause of damage to stored cushions.
Hammock Care:
Remove the hammock from its frame, lay on a tarp and sweep off any surface debris. Wet the entire hammock with a hose. Using a mixture of warm water and dish soap sponge clean all surfaces of the hammock. Rinse all soap from the hammock and dry thoroughly. Cleaning tip: If mold and mildew have stained your hammock material use full strength white vinegar and scrub the area using a hand brush, allow to sit for 10 minutes or so then rinse and allow to dry before storage. Once dry, fold and store in a contractors garbage bag or wrap in plastic to protect the hammock during storage. Storage tip: if your hammock frame is easily disassembled place it in the same bag. This will make finding all the pieces easy when you are ready to relax on your patio again next summer!
Umbrella Care:
The fabric of your umbrella is easily cleaned once you remove it from it’s frame and lay it out on a tarp to protect it from grass and dirt while cleaning it. Sweep the loose debris from the fabric, scrub any mold or mildew areas with a dry brush, then wet with a hose until all the fabric is wet. Mix a cleaning solution of 2 cups of warm water, 2 cups of white vinegar and a tablespoon of dish detergent (Dawn cuts grease). Scrub the umbrella fabric with a hand held brush and the cleaning solution until the entire umbrella is covered. Let the solution set for 10 minutes then rinse with a hose to remove all of the cleaning solution. Allow to air dry thoroughly.Cleaning tip: Treating the umbrella fabric for mold and mildew before storage will help protect it during the months stored. If after cleaning you see additional mold and mildew stains wet the fabric and scrub using a hard brush and full strength white vinegar, allow to sit for 10 minutes, rinse clean and allow to dry. Storage Tip: Place a clean and dry umbrella in a bag and tie to the cleaned umbrella frame.
Mold and Mildew Removal:
A generic mold and mildew cleaning solution that will work on most surfaces is a 50/50 mixture of water and white vinegar. Spray on the surface of your furniture, let it set 30 minutes before rinsing. Follow with a towel drying and then allow to thoroughly air dry. For extensive mold and mildew removal especially on fabrics like cushions, hammocks and umbrellas, dry brush the area to remove surface mold, rinse and allow to dry. Scrub using a hand brush and full strength white vinegar completely soak and scrub the affected area, let sit for 10 minutes then rinse off with clean water and let dry. Protecting your outdoor living and patio furniture from mold and mildew is important to prolonging the life of your investment.
Cleaning your furniture properly before putting it in self storage is the best way to protect it. An additional step would be to add strong scented dryer sheets in the bags to prevent rodent invasion. They dislike strong odors. Check with the storage facility to be sure they have pest control methods in place. With regular cleaning and proper storage you can enjoy your patio living space for years to come.
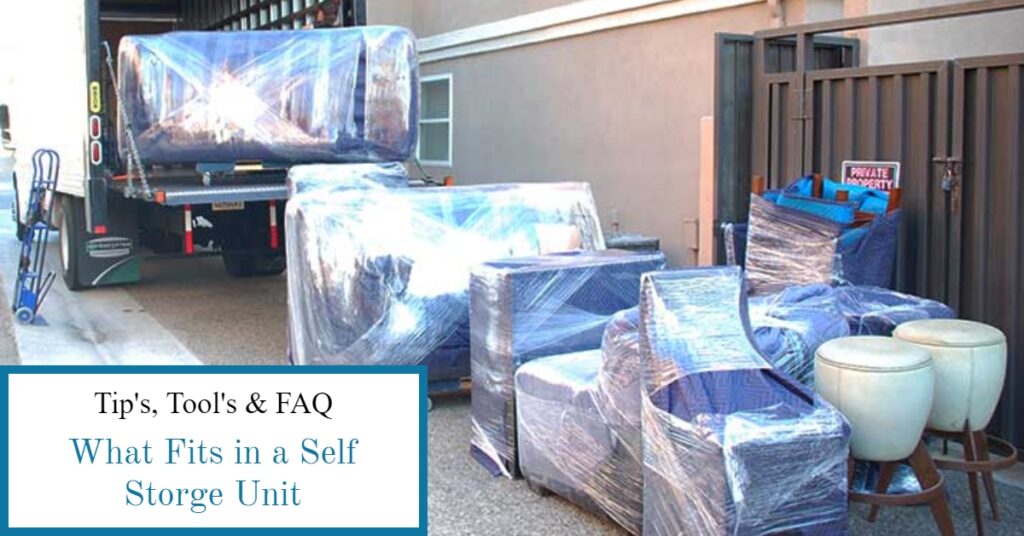
If you are like most of us square footage means nothing. Short of pulling out the tape measure and measuring out the area of a self storage unit in Bangor, Maine and visualizing if what you have will fit into that space. It’s hard to imagine. Then take into account the height of the self storage unit this will also influence what will fit. Choosing a self storage unit that is appropriate for your needs can be easy by using the size guide below and utilizing the knowledgeable staff in Bangor. Safety tip: boxes and totes should not be stacked higher than your shoulders. Lifting heavy items from over your head can lead to injury so use care when stacking your boxes and totes in self storage.
The self storage industry uses standard size guides to help determine what will fit into a designated size unit. Take into consideration if your items are larger or smaller than the standard size when making a decision on a unit. Between the size and height of a unit and the measurements of the items going into storage, you can see how tricky it can be to choose the right size for your needs. Self storage facilities have a simple size guide that can assist you in choosing the correct unit. This size guide will provide you with a general idea of what will fit in a self storage unit based on the size.
5×5 Size Guide:
A 5×5 self storage unit is like a small closet, great for storing a small dresser, a twin mattress and several small boxes. It is also perfect for seasonal decorations, clothing, sports equipment, lawn and garden tools or just a little extra storage space if you have a small apartment. Looking to store old files from your office? 40 standard file boxes will fit in this size unit.
5×10 Size Guide:
A 5×10 self storage unit is like a walk in closet. This size is great for a couch, chair, standard bureau and some small boxes. For an office looking for some off site storage 85 standard file boxes will fit.
10x10 Size Guide:
A 10×10 self storage unit is equivalent to an average bedroom. This size will hold the standard furnishings from a one bedroom apartment. For off site storage for standard file boxes it will hold about 170 standard sized boxes.
10×15 Size Guide:
A 10×15 self storage unit is equivalent to a large bedroom. This size will hold the furnishings from a 2 bedroom apartment or a small house. Offices needing off site storage will be able to store 290 standard sized file boxes. A two door small car can be stored in a 10×15 unit.
10×20 Size Guide
A 10×20 self storage unit is like a large one car garage. This size will hold furnishings from a 3 or 4 bedroom apartment or house. A car, truck or small tow-behind camper can be stored in a 10×20 unit.
10×30 Size Guide:
A 10×30 self storage unit has the capacity to hold a 5 to 7 bedroom house. This unit can easily hold a car or truck plus the furnishings from a small house. This size unit is great for a large tow-behind camper or a small RV. The size of the RV or camper is limited by the height of the door for access and the length of the vehicle.
If the simple guide above doesn’t clarify the size needed we have three resources available to assist in a decision on the appropriate size. The first is our Size Guide , the Space Estimator and our friendly, professional staff who are always ready to help you.
What if I choose the wrong size and realize it after I’ve rented the unit? If you find you need a larger space the facility manager will be able to easily assist you. What will fit in a self storage unit can vary depending on your packing and stacking skills. A nicely packed unit will hold more than one that is unorganized. Tip: consider using a moving company to move your items into storage, they pack and stack for a living!

How safe are self storage units in Ellsworth, ME? Security is an important consideration when choosing a self storage unit. There are many factors affecting how safe a self storage facility can be. Most important are the measures the facility has in place and the things you can do to help secure your property while in storage. Ask about the security measures in place before you decide!
What Security Measures Are Already in Place?
We utilize each of the following security measures at our facility but what if we aren’t near you? Check out the security protocol the self storage facility has in place, oftentimes driving by will clue you in on some of the most obvious features such as security fence and gate, lighting and surveillance cameras. What about some of the other important factors such as secure key code entrance and staff that have your best interest as their top priority? This will require a call or a visit to ascertain.
Digital Surveillance:

Digital surveillance offers the best quality picture over tape storage. A security camera records everything that happens 24 hours a day. They will record in low light and provide evidence if an incident does occur.
Gated Security:
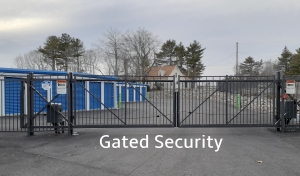
A security gate and fence is your first line of defense. A fence surrounds the facility and deters access from unwanted guests. Our gate is monitored day and night with a digital camera recording all activity around the gate.
Password Protected Entrance:
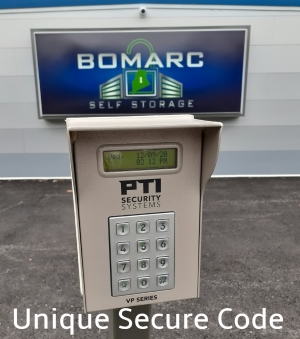
A good self storage facility will require each renter to have their individual secure pass code for entering the gate and any doors. These codes are unique to each user and provide an added layer of protection against unwanted visitors.
Lighting:

A well lit facility is a huge deterrent to criminal activity. Lighting throughout illuminates suspicious activity as well as brightens nighttime images on the video surveillance system. Lighting is very important to the overall security.
Staffing:
Onsite staffing is another layer of protection often overlooked. They monitor who goes in and out and look for unusual activity at the facility. They can be your eyes when you are not there. Walking throughout the self storage units inspecting locks and looking for evidence of tampering.
What Can You Do To Increase The Security Of Your Unit?
There are several things you can do to provide greater protection of your possessions while they are in self storage.
- Purchase a disc or cylinder lock. These locks afford the best protection because they are not easily snipped or cut. Oftentimes your homeowner’s/renter’s insurance will require this type of lock in order for your policy to be valid.
- Do not store valuables. Insurance policies whether your homeowner’s or the insurance you purchase at the facility will not cover money. Many will not cover valuable jewelry or collectibles. It is best to know what your insurance policy will and will not cover before deciding what to store in your unit.
- Keep your unique entrance code private. Sharing your code with others will increase the chance of a security breach.
- Choose an inside unit for an added level of protection.
- Make sure your unit is closed properly and locked before leaving the facility.
- If your door lock does not work properly report it to the facility manager. Your disc lock will not work as intended if the door lock isn’t working or is broken.
- Keep a record and pictures of your contents. This will expedite any claim if it becomes necessary.
- IF the unthinkable happens call 911 immediately! Do not touch anything until the police arrive. Notify the facility manager and your insurance company as soon as possible.
Picking the best self storage facility with the most security measures in place plus all the things you personally do to protect your possessions means self storage can be safe. It’s up to you to decide what level of security you feel the most comfortable with to secure your belongings while in storage. We strive to provide excellent security for a worry free self storage experience.
How does it work?

What is Contactless Self Storage?
Have you heard the words, “Contactless Self Storage” and wondered what it is and how does it work? Imagine renting a self storage unit from the comfort of your home or from your vehicle in the parking lot of the self storage facility! With the increased usage of the Internet and the ever growing popularity of online shopping, why not utilize both and make online self storage rentals that are easy to navigate and completely safe! Recently with the pandemic it became increasingly evident that contactless self storage rentals were not only needed but necessary to protect our tenants in Bangor, Brewer and Ellsworth, Maine!
How do you rent without any in person contact?
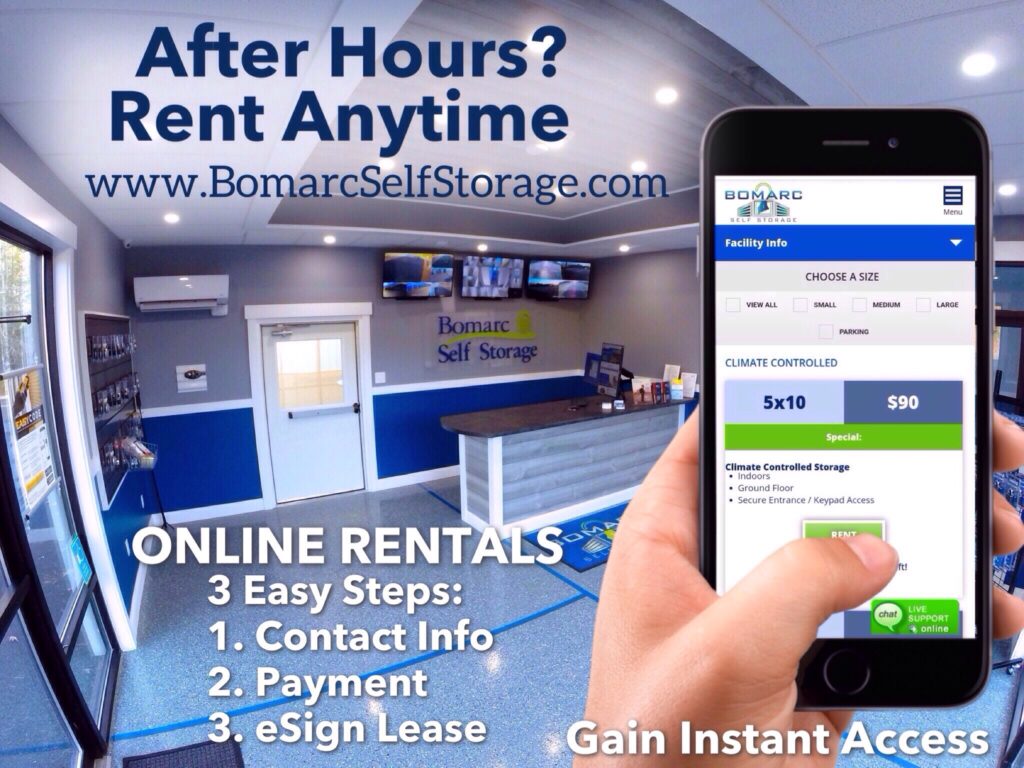
We offer a website that integrates with our in house rental software. This means our inventory is accurate and current prices are always displayed. The process is simple and easy to complete online. Three simple steps and you gain instant access to your self storage unit. There are several payment options available which offer further no contact during your tenancy. When it comes time to end your self storage rental we offer an online “Move Out” form or you can email the office of your intentions to vacate in the next ten days. From start to finish you never need to have contact with any staff unless you choose to subject yourself to their professional and courteous personalities!
How Does The Process Look Online?
Once you have accessed our website at www.BomarcSelfStorage.com choose the location nearest you be it Bangor, Maine, Brewer, Maine or our Ellsworth, Maine location. Search the inventory and choose the appropriate size. Not sure what size you need, use our Size Guide or Space Estimator tool to assist you. Once you choose a self storage unit that fits your need you can continue with the online process.
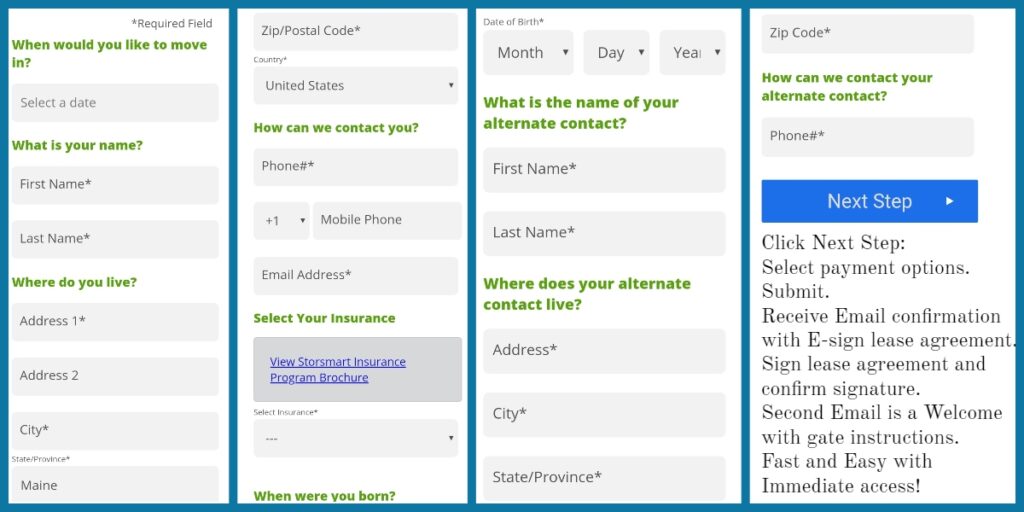
Fill in all the required information (Name, Address, phone number, Email and alternate contact.) We also offer self storage insurance if your homeowner’s or renter’s policy does not cover off site storage. Select the Next button and choose from our many payment options. Auto pay is our most popular option and available later if you decide to utilize this option in the future! Once completed you will receive an E-sign document with our lease agreement. Verify your information is correct, read the rules and regulations then E-sign the lease agreement. It has two required items and two optional items.
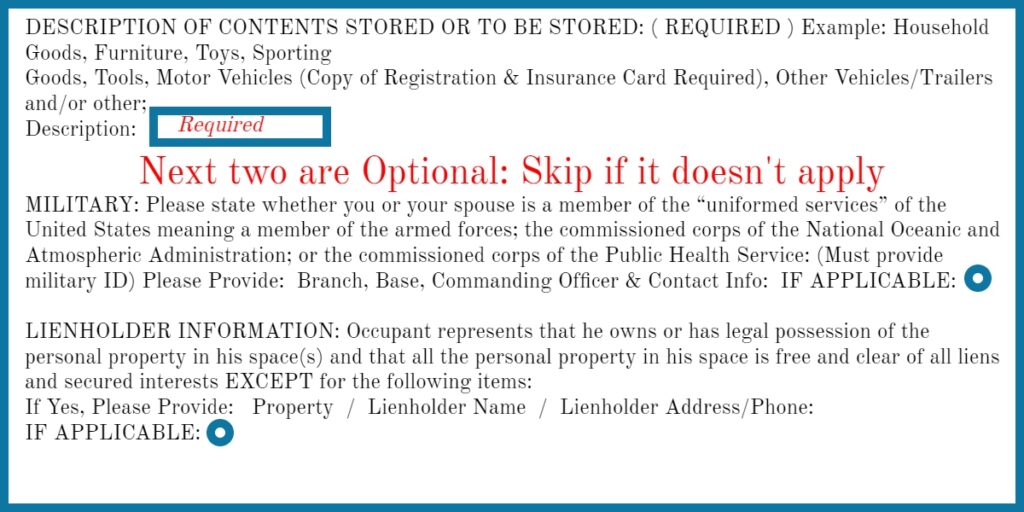
First required item is near the top. List of contents as required by law, (ie: Household, Vehicle, tools, building materials) Next are the two optional pieces and if they do not apply just scroll past. These are military or lien holder information on items in self storage please complete this section if you owe money on the items in storage.
Last required section is your signature agreeing to abide by the rules and regulations set forth in our lease agreement. Once the lease agreement is completed by confirming your signature, you will receive an email notification of the completion and giving you the unique code and procedure needed to access our facility. You now have instant access to your self storage unit.
Contactless begins here and can continue throughout the duration of your tenancy. Our staff is on hand to answer any questions via phone or email. During off hours the staff at our on call center will assist you. We diligently disinfect keypads, carts, doors and touch surfaces for your continued safety. Nearing the end of your tenancy? Easy, use our simple online “Move Out” form or email the office with your intended date of vacancy. Our aim is to provide an easy, safe and secure online rental process that protects you from unnecessary exposure from start to finish!.
Don’t Like Putting Your Information Online, But Still Want Contactless Self Storage?
We can assist you with a simple phone call to the location of your choice be it Bangor, ME, Brewer, ME or Ellsworth, ME! Provide us with the same basic information and we will happily rent you the perfect unit for your needs. We will also offer you the same great rates and contactless rental. As always, if you would like to experience our professional, friendly staff our office is open for you. Contactless Self Storage Rentals offer the best protection against exposure, plus are simple and secure!
Moving to Ellsworth Maine, Avoid 3 Most Common Moving Mistakes!
Moving is ranked in the top 10 most stressful events in life and can be the single most stressful event when things go wrong. It can be a logistical nightmare! There’s not a lot of room for mistakes when moving. First, it’s finding the right place, then packing and unpacking, finding new schools, shops and other services. In addition, there is also the financial stress and emotional aspect, especially if you’ve been in a place for a long time. Starting fresh in a new neighborhood, city or even country can be extremely stressful.
Getting ready to move to or from Ellsworth, Maine, and need some moving tips to help you stay on the right track? Avoid the three most common mistakes made while moving to help avoid a disaster and prevent unnecessary stress in your life. The following tips can help you plus utilizing self storage can be a huge stress reliever!
Avoid the Three Most Common Mistakes!
Poor Time Management: Waiting Until the Last Minute
Procrastinating will only make things harder on you, leading to unnecessary stress. It’s best to start planning your move ahead of time, as in weeks and even months beforehand. Waiting until the last minute may cause you to forget important details that can quickly escalate into an epic disaster. Waiting until the last minute can create a nightmare when you unpack.
Packing Tip #1: Start packing as soon as possible. Start with non essential items, sort belongings, pack them a little at a time. Label boxes well to save you time when it comes time to unpack! Put yourself in a prime position to have everything ready to go on time. Storing these non essential boxes in Self Storage will help keep your house neat and make it easier to finish packing.
Keeping Things You Don’t Really Need
A list of moving tips wouldn’t be complete without talking about clutter. Whether you’ve been in your current place a year or twenty years, we all accumulate things, now is the best time to downsize. It’s easy to start throwing everything you own into boxes and loading them onto a truck. But once you’re at your new place, you’re stuck with things that you don’t really need! The extra work when unpacking can add unnecessary stress to an already stressful situation. Take a little extra time now, it will be worth it.
Packing Tip #2: Go through your things critically. Decide what you should and shouldn’t keep. Make separate piles, consider donating your excess belongings, having a yard sale to earn some extra moving cash, and disposing of things that are beyond their prime. Only keep what you need in your new place.
Packing Without the Right Supplies
Before you begin packing, it’s crucial to have packing supplies on hand. Packing will go smoother for you and everyone involved if you have all the right materials. You might only think about boxes and tape, but also consider how you will pack fragile items. Plan for your larger items, how will you move larger items in your home. Having all the correct supplies on hand for moving day will help for a smooth transition.
Packing Tip #3: Use carts and dollies to move heavy items. Have bubble wrap and packing peanuts on hand to protect your breakable items. Mattress and furniture covers are invaluable for protecting your possessions during transport. You can use old blankets to protect furniture as well.
Storage Units Make Packing and Moving Easier
Moving in Maine is hard enough; don’t make it harder on yourself by waiting until the last minute or packing without having the right supplies. Avoid some of these common packing and moving mistakes by planning ahead, banishing the clutter, and using self storage units to your advantage. With storage space in Ellsworth, Maine, you can place your items in a unit before moving to help alleviate the stress of stumbling around stacked boxes. Once you move to your new location you can bring them home as you need them, thus keeping loads of boxes out of your way as you prepare to move into your new home.

During this time of Covid-19 when families are drastically affected by the shutdown or closure of many businesses in Ellsworth, Maine. Many local services are following the state guidelines, slowing down the process for help to these families in need. When it takes 6 months to finally receive the unemployment money you applied for at the beginning of the pandemic things can be very stressful. What can you do to help others?
Tip #1: FOOD HELP
Search out your local food pantry or food bank and donate non perishable items. Every item helps a family provide nourishment and prevents hunger. Want to help in a big way? Volunteer your time if they are doing delivery to homes to keep the possibility of contamination down. How rewarding to drop off a much needed box of food to a family in need!
Pro Tip: Go to your local dollar store and purchase 20 items that are essential to a home that are often overlooked at food pantries. Items like toothpaste, body wash, diaper wipes all things that never go bad and will help a family keep healthy too! (check to make sure the place you are donating the items to will accept these types of donations)
Tip #2: HOMELESS SHELTERS/HALFWAY HOUSES
Imagine being in a shelter during this time of uncertainty. Like food pantries the shelters provide meals, as well as showers, laundry and other necessities. Check with your local shelter and see if they can use laundry detergent, dish soap, paper towels, toilet paper, bleach, and food. Use your local family dollar again for the biggest bang for your donation dollars.
Pro Tip: Check with your shelter and see if they are accepting clothing and other household items to assist with setting up a rental for their clients. If so go through your house and donate items you no longer need from clothing to towels, dishes and linens.
Tip #3: HOLIDAY HELP
With the approaching holiday season this year will be especially hard on many families. Donate coats, hats, gloves to the Coats for Kids campaign. Donate at a Toys for Tots, Angel Tree location or at your local Catholic Charities organization. When you see the Salvation Army ringing their bell outside a store stop and drop some change or bills into the red kettle. Every little bit helps these organizations provide a gift to a child or family affected by this pandemic.
Pro Tip: Volunteering at one of these organizations can be a rewarding experience. A little time goes a long way! Volunteer to shop for the gifts, drop off Thanksgiving or Christmas meals, be a secret Santa!
There are many other little things you can do to help others. Check with your neighbors to see if you can save them a trip to the store for milk and bread. Assist an elderly person by picking up their prescriptions and other items to save them a trip out and possible exposure. It takes a community to survive, become part of your community!
ABOUT US
LOCALLY OWNED AND OPERATED
Bomarc Self Storage is an affordable and safe self storage solution for you or your business. We offer no contact online rentals through our easy to navigate website. Three simple steps gives you instant access to our state of the art facilities, conveniently located in Bangor, Brewer & Ellsworth. We provide our customers with the latest features and security in outside drive-up and climate controlled units.


Our facilities are well lit, with gated entry and security cameras both inside and out. Every tenant has their unique code allowing them access 24-hours a day 7 days a week. We offer some packing supplies for sale as well as pad and disc locks for your unit.

Our friendly and courteous staff is ready to provide you with the highest level of customer service. Give us a call today or ask a question online to see how we can help you with your self storage needs. Safe, Secure, Convenient.
Bomarc makes storage easy !!
Recent Comments