Category: Bomarc – Bangor Maine
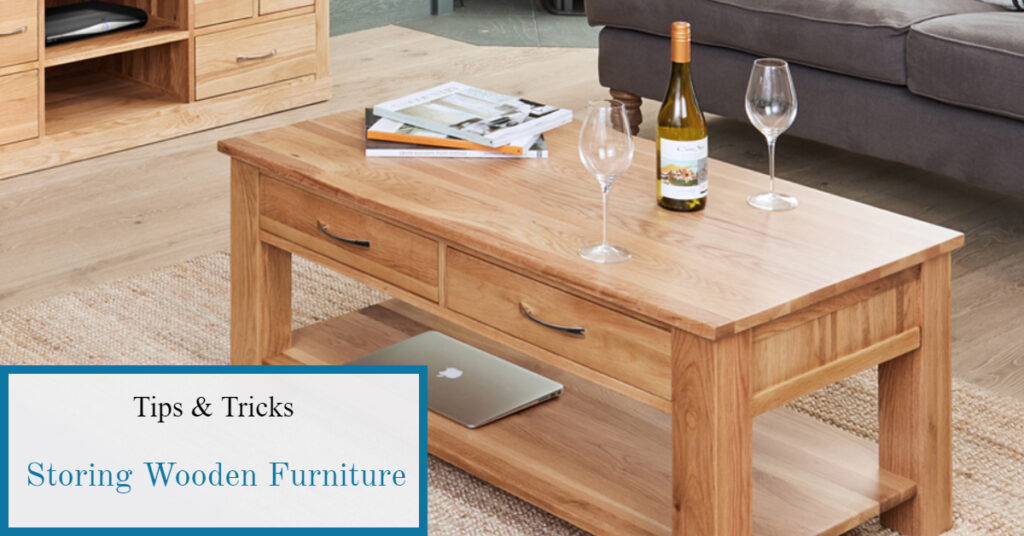
Keep your wooden furniture safe with correct storage. Whether moving, downsizing, or just looking to free up space, storing your wooden furniture helps it stay in top condition for years. This guide will help with choosing self-storage. It will help prepare for wooden furniture storage and the basic steps for furniture storage.
Section 1: Understanding Self-Storage
Self-storage is for people seeking extra space without moving to a larger house. These facilities offer secure and convenient options for storing furniture, including wooden pieces. Before you start on the storage journey, consider these key things:
1. Choosing the Right Facility: Select a self-storage facility with climate control and security features to protect your wooden furniture from temperature changes and possible theft. Look for a facility close to you. Check if they have the safety features you want. An on-site staff helps prevent theft.
2. Proper Packing Materials: Buy packing materials such as bubble wrap, furniture covers, and packing tape to protect your wooden furniture from dust, scratches, and moisture. Also, buy moisture packs to help prevent moisture in your storage unit.
Section 2: Wooden Furniture Storage Tips
Now that you have chosen the perfect location for self-storage, let us talk about the steps to store wooden furniture:
1. Take Apart if Possible: In other words, take your wooden furniture apart. It will save space and reduce the risk of damage during moving and storage.
2. Clean Thoroughly: Clean your wooden furniture before storing it. Dust and debris can cause scratches and damage over time. Use a gentle cleaner for the type of wood. Allow time for the wooden furniture to dry completely. Dry wood will prevent mold growth.
3. Apply Furniture Wax or Polish: Adding a layer of wax or polish helps save the wood. Wax or polish adds a layer of protection from the environment. Make sure the furniture is completely dry before waxing.
4. Use Furniture Covers: Cover your wooden furniture with the correct-sized covers. Furniture covers protect wooden furniture from dust and stop scratches, especially if the furniture is stacked close to each other.
Section 3: Preparing Furniture for Storage
Preparing your wooden furniture before storage is necessary for its long life. Follow these steps:
1. Remove Hardware: Take off any removable hardware. Hardware like knobs, handles, or decorative elements. Removing hardware prevents them from getting lost or causing damage during storage. A storage hint: place the hardware in a zip-style baggie and tape it to the back of the furniture. If the furniture has a drawer, put the baggie in the drawer and tape it closed. When it is time to put the furniture back together, the hardware is close by.
2. Wrap Fragile Parts: Use bubble wrap or foam padding to protect delicate furniture parts. Wrapping table and chair legs prevent damage.
3. Secure Drawers and Doors: Tape drawers shut. Secure doors with tape or straps to prevent them from opening during transport or storage.
In Conclusion
Storing wooden furniture does not have to be a scary task. You can keep your wooden furniture safe for years. Remember to choose a safe self-storage facility, follow correct storage methods, and prepare your furniture well. Proper furniture storage will guarantee that your wooden furniture is in top condition. In other words, storing your wooden furniture will help it last. Happy storing!

Following are 6 winter moving tips that are sure to help. Moving during the winter has its challenges, weather being the biggest challenge. Whether the move is cross country, cross the state, or cross town the weather plays a huge role in winter moves. Oftentimes, winter moves deal with snow storms, brutally cold weather and unforeseen delays. Therefore, it is important to pay attention to the weather forecast during this transition period.
Being prepared for the worst weather will make the move easier. It is best to keep in contact with the moving company for any last minute changes due to the weather conditions. If you are moving yourself, knowing whether a storm is coming will help in the decision on renting the truck. Therefore, it is important to be aware of the weather. The 6 winter moving tips below are sure to help you.
6 Winter Moving Tips: Be Prepared is # 1
It is important to have your vehicle storm ready for the trip. Make sure the gas tank is full, tires are properly inflated, and any emergency equipment is in the vehicle. Unfortunately, breakdowns do occur. Being prepared takes some of the stress out of the situation. Therefore, it is important to prepare for the possibility of a breakdown during a winter move.
#2 Keep Warm
Secondly, keeping yourself warm and dry is a top priority. Wear layers, if you are warm you can take a layer off. Then if you get chilled you can put that layer back on. Keep extra gloves in your vehicle in case yours become wet or cold. A simple trick is to keep hot drinks and hot snacks available. Drinking a hot beverage will warm you up from the inside.
One energy saving tip is to turn the heat off at both locations during the actual move. Once the movers are done, turn the heat back on. It is better to have the heat run steady for 30 minutes than to have it run all the time the movers are loading or unloading the truck and then the 30 minutes or so to heat the house back up. It is advisable to have a warming room if you turn off the heat. Choose a small room and bring in a few electric heaters. Keep in mind that children and pets should not be allowed in the warming room alone.
6 Winter Moving Tips: #3 Services On
Other things to consider are the services in your new location. Making sure the electricity and water are on, heat is running properly, Internet and cable are working will add peace of mind to any move. In the winter it is especially critical to have the heat operational. Therefore, making sure the services are on and operating properly will help during a winter move.
#4 Protect your flooring
Next, protect your flooring from the snow and dirt on the movers feet. Lay down plastic or tarps and keep a mop ready for any melting snow that makes it off the floor protection. This simple step could save you costly repairs to flooring.
6 Winter Moving Tips: #5 Self Storage
An often overlooked option is renting a climate controlled self-storage unit. The benefits during the brutally cold winter are very apparent. The movers can drop most of the non essential items into self storage. Then deliver the essentials to your new home. This will eliminate the time the heat will be off at your new place. The movers or you will not be exposed to the winter elements for an extended period. Then once you have unpacked the essentials you can bring in a few boxes at a time from self-storage. Self-storage is a great option for a winter move.
#6 Be Flexible
Lastly, take some of the stress out of a winter move by being flexible. Especially during the colder months incidents happen that can destroy a schedule. Setting your mind on a fixed time frame can set you up for big disappointments. Therefore, breathe and know the move will happen, be flexible and understanding.
Whether it is a large cross country move or a simple cross town move these 6 winter moving tips will help make a winter move less stressful. Being prepared and flexible about a winter move can make a tough task easier. In other words, take a little time and prepare your vehicle and homes for a winter move. Then be flexible about any issue that arrives that is out of your control. It is the little things that make a big difference in a winter move.

Self-storage questions commonly asked by a first-time renter. Self-storage is a great solution if extra space is needed. However, if it is your first time you may have several questions about self-storage. Questions like; what is the difference between drive up and climate-controlled units? What type of identification is needed? What is not allowed to be stored? These questions are often asked by new renters and their answers can be found below.
What is the difference between drive up and climate-controlled storage?
Typically, a drive-up storage unit is also called a traditional storage unit. This means an enclosed outside building with a garage-type door for each unit. The renter can drive up to the door and access the unit. Traditional storage units have no heat or cooling methods.
Climate-controlled units are found inside a building and are regulated for temperature and humidity. These units have the same type of doors but are enclosed inside a large building. The temperature is watched and is best for items sensitive to heat and humidity such as photos, antiques, and musical instruments.
Other types of storage are outside parking which is exactly as it says. A parking spot inside the gate for protection. Other types can be covered parking which would have a roof over the parking spot. Bomarc Self Storage does not offer covered parking and has limited availability on outside parking spots with time constraints due to winter snow removal.
What size units are offered?
Drive up storage typically starts at the small size of a 5×10 (which is the least expensive) and ranges to the larger size of a 10×30. In between these two sizes are the other sizes found such as 10×10, 10×15, and 10×20. Some places offer oversized storage spaces with higher-than-normal ceilings and extra width in a 12×20 or a 12×30 size.
Climate-controlled storage ranges from the smallest size of a 5×5 (the least expensive) unit to the largest unit of 10×20(the most expensive). The sizes in between these two are 5×10, 10×5, 10×10, and 10×15. Traditionally the ceilings are higher in a climate-controlled building than in the outside drive-up units.
What will fit in a storage unit?
Each size will hold a specific number of belongings. The best gauge is the size guide on our website: https://bomarcselfstorage.com/what-size-unit/what-fits. The industry standard is a universal guide, a 5×10 is like the size of a walk-in closet. A 10×10 will hold the contents of a 1-bedroom place. Then the 10×15 will typically hold the contents of a 2-bedroom place. Lastly, a 10×20 will hold the contents of a 3–4-bedroom place. It is best to rent a unit one size larger than you think you need. Especially if there is any question about fitting all the possessions in a unit or if you have extra furnishings, or oversized items. When talking about self-storage, it is in your best interest to have more space than not enough.
What kind of padlock do I need?
When it comes to security, a good padlock is needed. A standard padlock works to satisfy the lease requirements but what if you want more protection? The disc lock is recommended by most insurance companies offering self-storage rental insurance. Read the insurance form carefully as they all require a certain type of lock for their coverage to be valid. Disc locks are recommended because they are difficult to cut quickly. It requires a noisy grinder and thieves like to be quiet. There are many diverse types of padlocks on the market from simple key locks to ones that require pass codes to unlock them. Finding one you feel your possessions are safer with would be the best one to choose.
What type of ID is needed to rent a storage space?
At Bomarc Self Storage you must be at least 18 years old and provide us with a form of government-issued identification such as a State Driver’s License or state issued ID. Another form of identification would be a passport.
How do I pay for Self-Storage?
We like to offer a wide range of payment options to make paying for your storage unit a breeze. At Bomarc Self Storage you can come in to pay in person, drop a check in our convenient Drop-Box, pay over the phone, use our easy online payment portal or use AutoPay to never forget your payment again. We accept money orders, checks, American Express, Discover, Mastercard, and Visa at all our locations.
Do I need insurance?
Many self-storage facilities require insurance to store your items with them. We highly recommend buying an insurance policy while your items are being stored. The coverage is an added piece of mind for your possessions against unforeseen incidences such as break-ins, storm damage, structure failure, or other emergencies. We offer insurance or you can check with your homeowners or renters’ policies to see if they cover off-site storage. If not, we can add storage insurance at any time.
When can I move my stuff in?
Once you have signed a lease you will have access to the facility. If you are renting online, you will receive a secondary email with how to access the gate. If you are renting in person, you will receive personal instructions on the gate process as well as directions to your unit. In other words, as soon as the lease is signed you have access.
What hours do I have access to the facility?
Bomarc Self Storage allows 24/7 access to the facility with your secure gate code. Each code is unique to a renter. For example, one code might be 4 digits long and another 10 digits long. The best part is you choose a code that is easy for you to remember. Our staff is available M-F 9am to 5pm to answer your questions and help you. All locations are well lite with 24/7 video surveillance and keypad access only.
May I look at a unit before deciding?
“May I see a Unit?” is one of the most often asked questions at Bomarc Self Storage. Most self-storage facilities will offer a tour during business hours. We recommend calling our friendly staff and scheduling a tour. We offer tours 9am to 5pm Monday through Fridays.
What kind of notice do I give when I am moving out?
Each storage facility will have its own requirement for a move out notice. Some are 30 days and others are 15-day notices. However, Bomarc Self Storage only needs a 10-day written notice before vacating a unit. To make it easier for our tenants and their busy lifestyles, an email notice is the best choice. A quick simple email that states “I will no longer need my unit after” works the best.
What security measures are in place here?
All the Bomarc Self Storage facilities have cameras, keypad access to the gate, and lots of lights for nighttime security. Our facilities with climate control have keypad access only to the buildings. Each person has their own unique code. During the day on site staff bring an added layer of protection.
Are there restrictions on what can go in a unit?
Most self-storage facilities will have a list of items that are not acceptable as storage items. These are money, priceless jewelry, firearms ammunition, and perishables. At Bomarc Self Storage our list includes food items like sugar, flour, cereal, rice etc. This list extends out to dry cat food, dog food or wild bird seed. Rodents are attracted to these items, and we do all we can do to discourage a rodent population. Our pest control guys would be incredibly grateful for your help in this fight. We also do not allow toxic chemicals, explosives or any living in the units.
Each storage place will have its own list of items not allowed. They may have different security measures in place as well. Therefore, it is best to call and ask these questions before renting a unit.
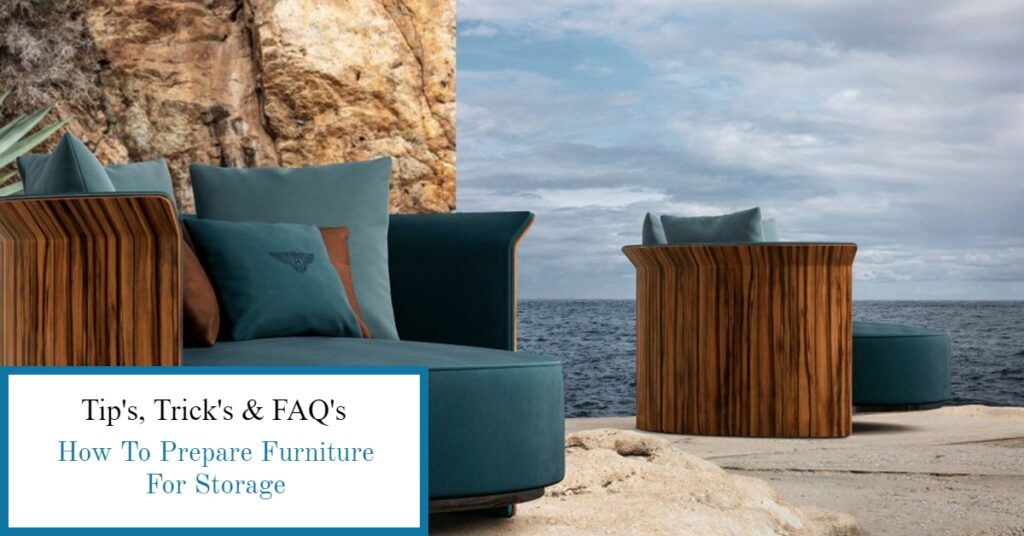
Preparing furniture for storage is critical. Furniture is expensive. Not preparing it properly before storing, will ruin the furniture. Who has the extra money to replace ruined furniture. There are several things that can be done to prevent damage. As with anything going into storage, furniture takes a little prep work. Firstly, knowing what types of materials the furniture is made from is important. Next, what types of cleaners work best on the material. Then the proper way to clean it. Lastly, once it is cleaned and dried what final steps can be taken to protect the furniture going into self-storage. Therefore, preparing furniture for storage will help save your investment.
Materials:
Furniture comes in many styles and materials. First it is important to know what type of material before cleaning. For example, wood requires a few steps, but plastic or plastic resin furniture is a wash and dry method.

Wood furniture should be dusted first with a damp cloth. Next, wash with a mild solution of soap and water. Murphy’s oil soap is a great cleaner for all types of wood. Then allow to thoroughly air dry. Lastly, oil or polish furniture. Cleaning ensures that no contaminants like food or mold and mildew follow your furniture into storage where unchecked they can damage wood.
Resin or plastic furniture should be dusted first. The best method is with a vacuum cleaner and the soft bristled brush attachment. Especially as most resin furniture is textured. Next mix a solution of mild detergent and water. Hose down the furniture and then wash with the solution. Then rinse thoroughly and allow to completely air dry. If the hose option is not feasible, hand wash the furniture. Then use a sponge and clear water to rinse. Be sure to rinse sponge several times to remove all the detergent.
Metal furniture is easy. Inspect for rust and remove as this will continue to oxidize during storage. Next, wash with a mild non-detergent soap, rinse, and completely dry before storage. If the rust removal took place, repaint the damaged area to further protect the metal.
Leather furniture should be stored in climate controlled; leather is extremely porous and will succumb to moisture and heat. If climate controlled is not available be sure to use a good leather cleaner and follow with a great conditioner. Accessing the storage unit a few times a month will allow fresh air to circulate through the unit helping keep the unit dryer.
Cushions or Fabrics:
Cushions come in two kinds, removable covers and non removeable. If the cover is removable, remove it and wash in the washing machine. Then prepare a solution of mild soap and water in a bucket. Wash the inserts and rinse thoroughly squeezing as much water as possible from them. Allow them to air dry. It is particularly important to allow them to dry completely. They will mildew in storage if not completely dry.
Non removable covers take a little extra work. Sometimes the best option is to use an upholstery cleaner, for the fabrics that can be cleaned with one. If after the patch test the material shows it should not be cleaned with an upholstery cleaner, it will require hand washing. A patch test is recommended if the material has never been cleaned before with an upholstery cleaner. The patch test consists of testing a small area first to see if it damages the material.

If a patch test shows you cannot use upholstery cleaner follow these steps to clean the cushions. First, brush any crumbs, dirt, or loose material from the cushion. Next, mix a solution of mild soap and warm water. Then wet the cushion and brush gently with a soft bristled brush to remove any stains or grime. Once the exterior of the cushion is cleaned, gently submerge the cushion in the solution and squeeze. Remove from the water and rinse in clean water until there is no more soap in the cushion. Finally, allow to air dry until the cushion is thoroughly dry.
For best storage of cushions, wrap in plastic or if they are too large then place them together and cover them with a tarp, sheet, or other covering to protect them from dust.
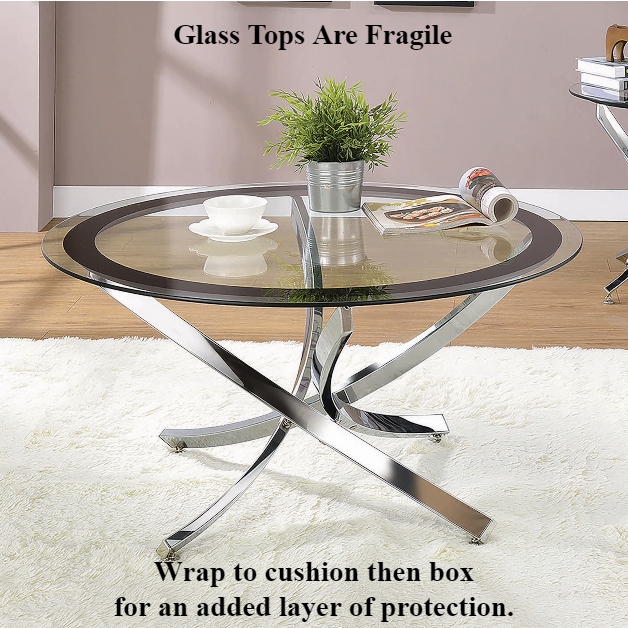
Glass Tops:
Glass comes with its own cleaning requirements. Use cotton gloves to avoid greasy fingerprints. Grease can cause mold and mildew when being stored. Clean the glass and remove it from the base if possible. Wrap the glass in a protective layer. You can use bubble wrap, furniture pads or blankets. If the top is round, use cardboard to create a box for the wrapped top. This will help prevent rolling and add an extra layer of protection.
Storage Hints:
Now that the furniture is clean and thoroughly dry. Let us look at how to prepare the furniture for self-storage. First, is the furniture easy to disassemble? If it can come apart take it apart! This step will save space in storage. For example, a table taken apart will require less space to store than if it was fully assembled. Next be sure to secure all hardware to assemble the furniture in a zip lock bag and tape to the backside of the furniture. When it comes time to assemble the furniture after storage everything you need will be with the furniture.
Next, if the furniture has drawers, such as a bureau, take them out. Moving the furniture will be easier. Once it is in storage put the drawers back. Do not forget to use that extra space for storage! This will provide an extra layer of protection for fragile items. To utilize this space, wrap fragile items in bubble wrap and pack into the drawer, then close the drawer. Any added layer of protection for fragile items is a bonus!
Lastly, for items such as couches, cover the couch with a sheet, or other covering. This will help keep the couch from getting dusty. Also, it is best to add a dryer sheet or two to help keep the couch smelling fresh. When the items come out of storage allowing them to spend a little time in the fresh air and sunshine will assist in freshening them up.
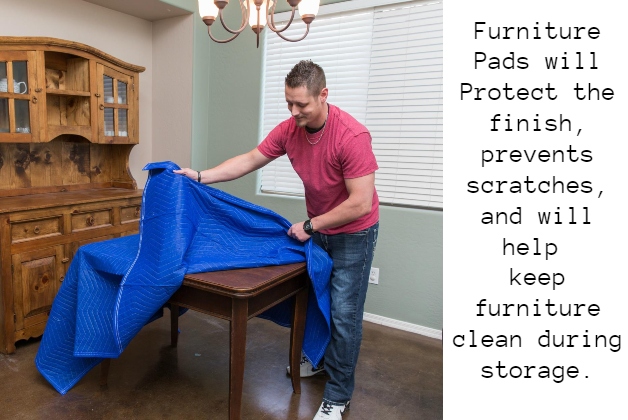
Added protection:
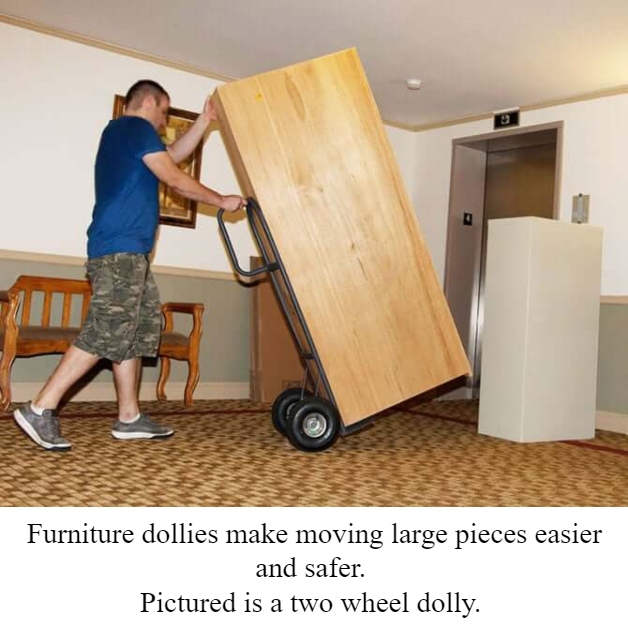
During the moving process damage can occur to furniture. Things like scraps to the finish, a leg can break off, or any number of things can happen. One of the best ways to prevent damage is to use furniture blankets. These handy blankets will protect finishes and can be used as covers in storage to prevent scratches and dust.
Another moving must, especially for sizable items is the furniture dolly. These come in several sizes and styles to assist in moving furniture safely. One is a two-wheel dolly. These are great for moving midsized items.
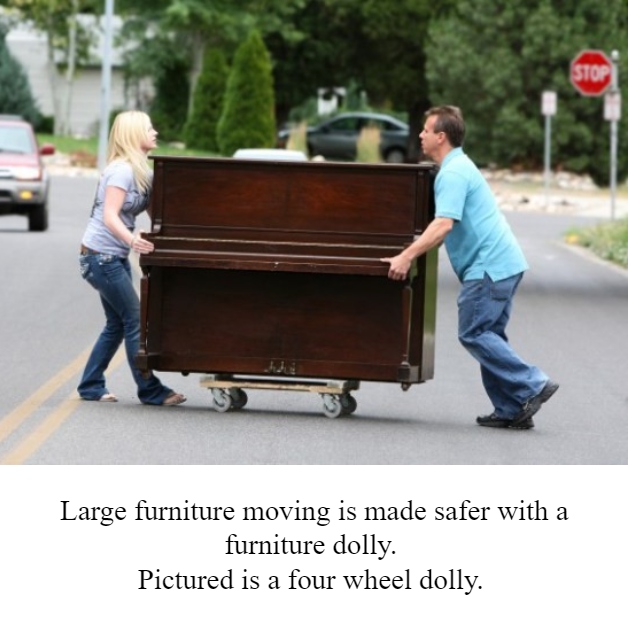
Next are little four-wheeled dollies. These can be used individually or in combinations based on the size of the furniture. They make moving bulkier pieces a breeze. Therefore, If the item is an oversized piece, consider renting a furniture dolly to assist with moving.
If the furniture has any value, go with a climate control unit. The units are controlled to prevent excessive temperature changes which can damage wood, leather, and other materials. When the furniture is less than valuable and will be stored for a brief period, an outside drive up or traditional storage unit will work. As always, make sure the items in self-storage are covered with a homeowners or renters insurance policy. If not, purchase it at the self-storage location.
In other words, everything done to prepare furniture for storage is a step towards protecting your investment. A little prep work and insurance goes a long way towards making sure the money spent on furniture is not wasted.

How to store photographs correctly is an important question. It is particularly important when trying to keep old family photos in decent shape. In today’s digital world the storage needs for images is vastly different from those of a traditional photo. Take the first images created in the early 1800’s. These images were on a polished silver or glass sheet. Therefore, they have unique needs, different than a modern photograph. Despite their differences most photographs have similar handling and storage needs. Also, there are three very damaging conditions for photo images. Avoid these conditions when storing photos of any kind. The conditions are direct sunlight, moisture, and extreme temperature changes. These all will cause damage to your stored photographs. How to store photos correctly depends on the type of photo it is.
First, let us look at how to safely handle a photograph. When handling photographs of any type be sure to have clean dry hands. Do not touch the image. Use cotton, lint free gloves for the best protection. It is best to handle photos by their edges. Particularly because the natural oils in our fingertips will break down the photograph over time. Likewise, keep food, drinks, and children away from the images.
Next, there are some general things you can do to protect an image. For example, use a number 2 pencil to write information on a photograph. Markers and ink pens will bleed through the image over time. Also, the chemicals in the ink will damage the image. Number 2 pencils are graphite and will not bleed though to the image and will last forever. Then protect the image in an acid free sleeve and store where the temperature and humidity are controlled. Climate Controlled Self Storage is an ideal solution for photograph storage.
Types of Antique Photos and How to Store Them:
Daguerreotype (/dəˈɡerəˌtīp/)
From 1840 until 1860, these photos were popular. The mirror-like image is on a polished silver sheet. These photos are small, typically 2.75 inches by 3.5 inches, with a protective case. They are fragile and should not be exposed to direct sunlight. Direct sunlight and extreme temperatures will cause damage. Therefore, climate-controlled storage is best for these photos.

Ambrotype (ăm′brō-tīp′)
From 1855 until 1865, brought the popularity of the Ambrotype photograph. The image is created on a glass sheet instead of the polished silver sheet. The other difference is that they do not have the mirror-like reflection. Plus, they are kept in a hinged case. Climate controlled storage is recommended because these images are fragile.

Tintypes (ˈtintīp)
1855 until the 1900’s, tintypes were popular. They were on iron plates instead of glass or polished silver sheets. Tintypes were durable which is why they were popular for over 30 years. The tintype started out with hinged cases but soon were kept in paper sleeves or envelopes. They had delicate surfaces that could scratch easily.
Cartes des Visites (kärt də vēˈzēt)
From 1859 through 1870, Cartes des Visites was in demand. Cartes des Visites are albumen printed and mounted on thick paper. Albumen printing is egg white and silver nitrate spread on a paper. This forms a light sensitive layer. A glass negative is put on the paper and light is cast over the image. These were popular during the Civil War.
Cabinet Cards
From 1860 through the early 1920’s, cabinet cards were the photograph of choice. They were larger than the Cartes des Visites. Although, the images were created the same way, stiffer cards were used. This allowed the photographer’s information and advertising to be applied to the back.
In 1900, Kodak introduced the first camera to be sold to the public. This changed photography, it became a popular hobby for many. With this change came another challenge on to how to store photographs properly.
How to Store Modern Photographs
After the introduction of the Brownie Camera photography equipment and technology changed quickly. One thing that has not changed is the process to protect them. All the rules above still apply today to any printed photograph. With the introduction of photo albums and scrapbooks came a new threat to photos. Many of the papers or sleeves used were not archival safe. The glue in the photo corners used to secure photos to the paper caused damage. Over time better acid-free paper and photo safe glues were developed. Therefore, when shopping for an album or scrapbook check that it is acid-free. Protecting photos before storage is as important as when they are being stored.
First let us look at storage solutions. Today there are a lot of storage containers for photos. Acid-free boxes, plastic totes, photo albums, and scrapbooks to name a few. As mentioned above, be sure to check that all options are archival safe. The last thing anyone wants is to accidentally ruin photos in storage because the wrong method was chosen.
Next, is the proper way to store pictures in their box. Standing the photo up protects the image. Stacking the images one on top of the other causes warping and the images to stick together. Standing keeps them safe from warping over time. If the box cannot be filled so everything is standing, use a filler to keep them on their edge. If you must stack the images, only stack a few on top of each other. Always keep the negatives with the photos if one becomes damaged it can easily be replaced. Hint: using an acid-free index card as a divider helps keep the images organized and protects them from sticking together.
Last, knowing light, moisture, and temperature all cause damage over time, choosing the best location is important. The attic is not a good place due to the wild temperature changes that happen. Likewise, the basement will have moisture issues. A closet inside the house will work but the best option is climate-controlled storage. Climate-controlled storage is kept within the correct temperature and humidity range. In other words, to protect your photos choose climate-controlled storage.

How to store instant/polaroid images.
As photography advanced along came the instant photo. It was wildly popular because you had your image instantly or within a few minutes. The film came coated with the chemicals needed to process the image. This presented a different problem because the chemicals could dry out over time. It was recommended to refrigerate the film to slow down or prevent this from happening. Freezing the film did not extend the life of the film instead it caused the chemicals to crack inside the film. Once the picture was taken it slowly developed. The colder the film was when the photo was taken, the better the quality of the picture was after it developed. The cold film slowed down the chemical process.
Correct storage of these instant images was important to maintaining them. It soon became apparent that light and heat where the biggest dangers. Heat and sunlight caused the images to warp and change color. If left exposed to these conditions long enough the image would disappear from the photo. Therefore, the ideal storage is in an album or upright in a box protected from light and heat. A dark closet or a climate-controlled storage unit are the best options for storing instant photos.
How to Store Digital Photography
In 1990 an innovative technology joined the photography family. Digital photography debuted and took the world by storm. Within ten short years it was on every cell phone. This put a camera in the hands of 7.26 billion people worldwide today. With the development of digital images, no longer did you have to wait for the film to be developed. The image was available instantly. It did not cost anything to develop it nor to share it. They could easily be manipulated with photo editing software to create stunning images.
This overabundance of images held its own issue. How do you store so many images safely? First, each device has a storage card. It was easy to download the images onto a computer for safe storage. But was it truly safe? Computers can die and with it all your important photos. As a result, hard drives separate from the computer were developed. Now you could download all the thousands of photos onto an external hard drive and keep them safe.
Next, there are many thoughts on the proper storage of digital images. One such rule is to keep the original SD card from the camera or phone. Use the little tab on the side to lock the card so it cannot be overwritten. This can be expensive if you take hundreds of pictures a day. Therefore, the next rule might work best for you.
Second method is to download the images onto a computer. Organize them, then copy them onto the external hard drive. This method works best if you take many pictures every day. The thought is if you lose the SD card, the image is on your computer. If the computer dies the image is safe on your external hard drive.
Lastly, if every image is not a keepsake for you, choose the best image or images of the day. Then delete the others. Have the best image printed or developed. Then download the images onto your external hard drive. Display your best or store them with the external hard drive. This brings up a good question, where is the best place to store an external hard drive?
External hard drives have a few enemies. The number one is static with moisture being a close second. Store external hard drives in an anti-static storage bag. Once in the bag they can be stored anywhere. The only exception is if you are storing an original with the hard drive if so, choose an appropriate location for the safety of your original.

Summary
As seen photography has been popular for hundreds of years. Therefore, preserving the images across the ages is important. Keeping all forms of photography safe is important for having images to show to future generations. The best option is climate-controlled storage to preserve the past for future generations.
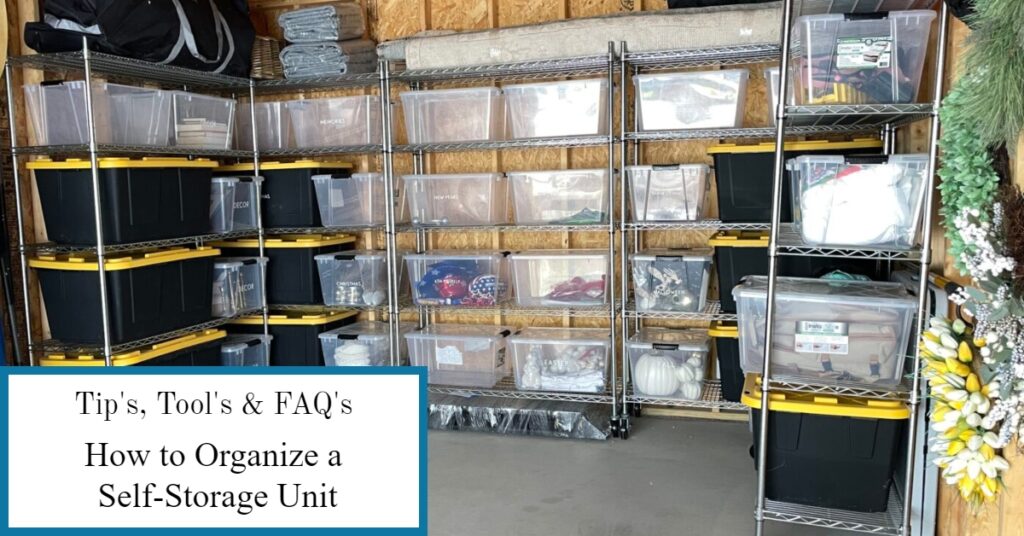
Self-storage organization can save time and frustration. Imagine opening a self-storage unit and easily finding the item you are looking for. The only way this will happen is with organization. Most storage units are not organized, nothing is more frustrating than needing something and it is in a box at the back of the unit. Recovering this item requires emptying the unit to find the item then packing it all back into the unit. Who has time for this? Therefore, organization of a self-storage unit saves time and frustration.
Organize for Resale Business
First step is to determine the size unit you will need. A space estimator guide (found here) is a great tool to help determine the correct size self-storage unit. Next decide how much extra space you want. Then choose the unit size that will allow you the level of access you need. As a reseller you may need to access the storage unit daily. Being ultra-organized will save you time and money. Lastly decide how you will organize with shelves, labels, and bins.
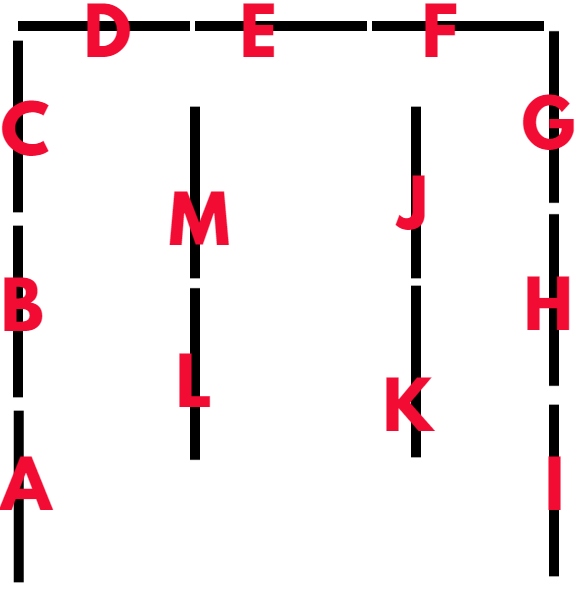
Now that you have an idea how you want it set up work up a plan-o-gram. A plan-o-gram is a diagram of where items are on a shelf. A plan-o-gram is a terrific way to know where items are located. A plan-o-gram will be labeled in sections and shelves will be numbered as well as the bins will need to be numbered. For example, the first section of the shelves could be labeled A, the next section B and so forth. Then each shelf in the section could be numbered 1, 2, 3 and so on. The bins could be numbered the same way. Therefore, if you were looking for an item and it was in Section C, self 3, bin 5 you would know exactly where to go to find that item. This is a huge time saver. Imagine having to spend hours looking through bins to find an item. Instead have a plan of organization that will help you spend less time looking and allow more time for shipping and selling. In other words, taking the extra time at the beginning to set up a system will save you time and money on the other end. Safety hint: store heavier items on the bottom shelves.

Organization for an Individual
The same method of organizing will work for an individual as well. The only difference is that you could label the boxes and decide that Section A is for Kitchen items. All kitchen items will then be stored in section A. Next Section B could be the living room boxes. As you build each section label it with the room being stored on those shelves. Therefore, the plan-o-gram would be simpler.
The benefits will far outweigh the cons. Imagine having to find the gift your sister gave you for your last birthday. She is coming for a visit and will expect to see her gift in use. Sisters are like that sometimes. The gift is in self-storage, and you have no idea what box it is in. This might require hours to empty the unit and go through the boxes looking for her gift. Imagine instead knowing it is in Section G and the box it is stored in is clearly labeled on the outside. Having a plan sure saves time and frustration.
Now it is time to move into a new home. The next benefit of having a highly organized self-storage unit will be very evident on moving day. All the boxes for the kitchen will be together and clearly labeled. The moving company, if using one, can clearly see that the box belongs in the kitchen. This saves time and your money.
Lastly, having an organized self-storage unit for a reseller is a necessity. The time it saves translates into money. Having an organized self-storage unit as an individual is purely a convenience. If you have the time to spend looking through boxes for items you need, organization will not be necessary. But if you are a busy person and have little time for a game of hide and seek with your possession’s organization is critical. Therefore, having an organized self-storage unit will save you time and frustration.

Heat pump dryers are new in the United States, but heat pump dryers have been in use in Europe for a while now. Heat pump technology has been around since the 1940’s and has evolved. Now many appliances in the home have this technology. Whether it is a heating/cooling system, hot water heaters or a heat pump dryer this technology is saving money and reducing our carbon footprint. Let us face it the savings alone with most of these systems saving 50 to 60% in energy usage is reason enough to consider this technology for any new appliance purchase. While each of these systems save money, they all have a few drawbacks as well. Therefore, do some research before making the final decision.
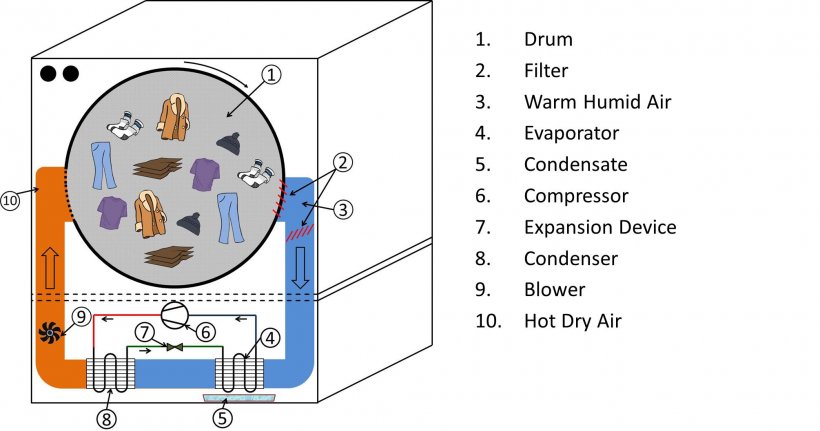
Heat Pump Dryer Technology
Heat pump dryers use the same technology for drying clothes as a heat pump water heater does for heating water. The air is pulled into the unit and heated via a compressor then forced at a higher temperature into the drum. This pulls air across the clothes which dries them. The water in the moist air is collected when the air is passed back through the compressor to complete a cycle. The water is deposited in a compartment for easy removal and emptying. Some larger heat pump dryers offer a drain tube which can be installed to drain into any septic system.
The removable compartment is a great option as the collected water can be used to water plants or any number of other uses. This saves water and is handy in areas where water consumption is of consideration. The compartment needs to be emptied after a few loads. If this is not in your lifestyle then it would be best to choose to install the drain tube which will automatically drain any water collected. The drain tube can be installed into the washer drain or into a sink drain.
Another notable feature of the heat pump dryer is that it does not require a vent to the outside. This means that it can be used in small areas including a closet. Along with the fact most can be plugged into a 110 outlet. While other dryers require a 220 outlet. These features open a whole new world of possibilities for dryer ownership.
As a bonus the clothes dried in a heat pump dryer are softer and have less wrinkles due to the type of heat produced. This helps save money because clothes do not wear out as quickly and need replacing. Towels and sheets are super soft and feel like new.
Heat Pump Dryer Things to Consider
Some things to consider before purchasing a heat pump dryer. This technology takes longer for clothes to dry. Therefore, if you have a large household with a lot of laundry the heat pump dryer may not be a viable choice. The average drying time is between one to two hours depending on the size of the load and the type of material being dried. Also, the drum size is smaller than electric or gas dryers.
Secondly, the upfront cost is higher for a heat pump dryer. The typical cost of an electric dryer is between 500 and 750 depending on the features of the dryer. The typical cost for a heat pump dryer is between 1,000 and 1500 depending on the features of the heat pump dryer. While the upfront cost is higher the energy savings help offset that cost and eventually recover some of the added expense.
Thirdly, heat pump dryers have a secondary filter to collect lint. This extra lint filter will require being cleaned after every 5th load of laundry. The one closest to the drum will need to be cleaned before every load. In addition, the compartment where the condenser is located needs to be vacuumed or brushed once a month. Keeping the lint filters and compressor clean help reduce drying times and keep the efficiency level high.
Lastly, if the incorrect amount of laundry detergent is used to clean the laundry a smell may develop. This smell can be removed by a secondary rinse and adjusting the amount of laundry detergent being used. Buildup on laundry can go unnoticed in a conventional dryer and cause clothing to deteriorate faster. Once the correct laundry detergent is gauged the second rinse can be discontinued.
Before Deciding
To summarize, making the decision to purchase a heat pump dryer will help the environment as well as reduce the cost of drying clothes. Saving money and helping the environment is a win, win situation. Make sure a heat pump dryer will work for you and your schedule. If the maintenance will not fit into your schedule choose a different option. Knowing the pros and cons will help you make the right decision.

Finding a local mover has many considerations to explore before deciding which one to hire. First, it is best to remember that each situation is unique. No move is like any other move. Second, there is no cookie cutter formula to finding the best local mover. It will take finding the best local mover for your situation. While each situation is different there are some basic questions that should be addressed before deciding. In other words, finding the best local mover is purely a personal endeavor.
First step is to do a little research online. Especially in this day of technology most movers are online or have a website. Spend a little time researching local movers and checking their website for reviews. Reviews are a terrific way to gauge how a mover interacts with their clients. The website can also be a great resource for what information should be gathered before making a call. Once the research is finished, start calling local movers for more information before deciding
What information is needed before calling a local mover.
Concise information is critical to a mover. Having most of the information before you call will save valuable time for both of you. So, what kind of information should you have ready? In addition to the obvious information such as name, address, phone number, date of move, and destination a mover will need a general idea of the type of contents being transported. Equally important is if any of the belongings are oversized such as a pool table or grand piano. Not only will this require additional help but may require specialized tools to move them. Oftentimes when thinking about contents to be moved the garage and basement are overlooked or the self-storage units are forgotten. Remembering these additional spaces will help the local mover provide a more accurate estimate. Therefore, having all the information will save time and result in a better estimate.
What questions should be asked before deciding on a local mover?
Before calling the potential mover, have a list of questions ready to ask. Remember each situation is unique and add any questions needed to cover your situation. Some of the most important questions to ask are:
Do they have their local license? Typically, each state has some sort of licensing. There are seven states that have no license requirements. Maine is one state that has no license to be a local mover. Be sure to verify if your state has a license requirement and if the mover has a current license. To help avoid a fraud situation, request a copy of the license for your records.
What insurance do they carry? Like the local license it is best to request proof of insurance for your protection.
Do they have a cancellation policy? If so, what is it? This is important as situations do arise that are out of our control. Knowing ahead of time about any charges will avoid a surprise if something does interfere with the move.
What type of payment options do they offer? Most local movers require a deposit on a job. Others might offer a 3 pay program. Each local mover will have their own payment plan. In addition, know what types of payments they will accept.
Would they prefer to pack any specialty items like televisions or other electronics? A local mover will oftentimes offer this extra service as added protection against damage. Due to the fact they could be held accountable for this damage. As experts they have the knowledge to protect delicate electronics.
Additionally, these questions would be important. How to contact the mover during the move? If they have references. How long do they estimate the move will take and what is their current availability? As each situation is different there may be other questions to ask.
Deciding is a personal matter
Cost can be the biggest determining factor when choosing a local mover. Sometimes the lowest estimate is not the best deal. Other determining factors may make cost a secondary aspect of the decision. In other words, the unique needs of this move may require a mover with more experience. Therefore, all the information that has been gathered should be examined to help you decide on the best local mover for your situation.
Once a local mover has been chosen, things to expect
A reputable mover will want to do a walk through to give an accurate estimate of the cost. There are a few situations where it may not be necessary. If the contents of the move are already in a self-storage unit. The local mover would know without looking what size truck would be needed based on the unit size and type of contents. Furthermore, they would know how many workers to send to complete the job easily. In general, most moves require a walk through.
Next a local mover may require you to sign a contract with them for the move. This is a wonderful opportunity to review the contract and ask any questions to clarify what is expected from each party. As always, read the contract in its entirety before signing.
Then expect a follow-up call a few days before the scheduled move. Good movers are busy. Therefore, do not panic if no contact happens between the signing of the contract and the few days prior to the move. Whenever your situation changes, contact the mover as soon as possible. Additionally, contact the mover the day before the move if you have not heard from them. At this time, it would be prudent to discuss any specific needs such as the self-storage unit being loaded first as it is going to be stored at another location.
Moving Day
The big day has finally arrived. The local mover you chose has arrived. Now what? Communicate with the supervisor any specific needs discussed at the pre-move phone call. Then trust the experts and let them do the job you hired them to do. The best thing to do is let the supervisor know where you will be, in case there are any questions. They know how to load the truck to keep everything safe, it is why you hired them.
Hybrid heat pump hot water heaters do not generate heat like a conventional hot water heater. Instead, they use electricity to move heat from one place (ambient air) to another (hot water tank). To move heat, they work like a refrigerator only in reverse. Hybrid heat pump hot water heaters use the air around the unit to generate the energy needed to heat the water but at a higher temperature conversion rate. Therefore, heat pump hot water heaters are more energy efficient than conventional hot water heaters. Increased efficiency means lower energy bills and greater savings over the life of the heater. Typically, 20% of electric bills are for heating hot water, a hybrid heat pump hot water heater cuts the cost of producing hot water by 73%, thus saving money.
How Hybrid Heat Pump Hot Water Heaters Work:
Heat pump technology has been around since 1948 and over the years has seen major improvements. The units are smaller, quieter, and more efficient than before. In 1948 American inventor Robert C Webber was experimenting with his deep freezer system and accidently burned his hand on the outlet pipe of the cooling system. As inventor minds go, he worked on a way to utilize this wasted heat. Before long, the first heat pump was built and used to heat his house and provide hot water for his family. Since then, technology has advanced, and the first large systems are now smaller and are more efficient.
Heat pump technology uses the ambient air around the system to heat or cool homes and businesses. Ambient air by definition; is air immediately surrounding of or relating to the immediate surroundings. The principle is the same as how a refrigerator cools but in reverse. A heat pump uses a compressor to take heat from the surrounding air and transferring it into a room. It uses this same principle to transfer heat at a higher temperature rate into the storage tank to heat water. Whereas a refrigerator uses the compressor to remove heat from the inside of the refrigerator and transfer it out into the air. Heat pump hot water heaters have a backup system of resistance elements. Resistance elements are used in conventional hot water heaters. The elements will be used when the ambient air temperature in the room is not high enough to operate the hybrid heat pump hot water heater efficiently. The ambient air temperature range for heat pump hot water systems is between 40°F (4.4°C) to 90°F (32.2°C).
What Size Hybrid Heat Pump Hot Water Heater?
Hybrid heat pump hot water heaters come in a variety of sizes. Which one will work best will depend on usage and family size. First determine the typical usage of the household. Is there a dishwasher, washing machine, how many showers a day are all things to consider before purchasing a system. Once there is a general idea of the type of usage choose the one that will suit those needs. If in doubt chose the next size up to be safe.
The most popular sizes for heat pump hot water heaters are 50-, 66-, and 80-gallon systems. The 50-gallon system is best for a two-person household. Then the 66-gallon system will work for a three to four-person household. Lastly the 80-gallon system is best for households of five or more people.
Settings and Features
Each system has a user interface or control panel. This easy to operate panel controls temperature settings, mode of operation, and diagnostic error reporting as well as providing the user with several programming options. Many have up to 99 programmable days available. This provides the user with many options for ultimate savings.
The modes are Efficiency, Hybrid, Electric, and Vacation. First, Efficiency Mode is when the system relies on heat pump technology or the compressor only to heat the water. Next, Hybrid mode will automatically adjust between the compressor and elements to match the demand for hot water. This means it will use the compressor to heat the water but when the demand is greater it will switch to the heating elements to meet the demand. The next setting is Electric Mode. Electric Mode is using the elements only which is the same as a conventional hot water heater. Lastly is the Vacation Mode. Vacation Mode drops the temperature of the water to 60 degrees. This will save money while away from the house for extended periods of time. It will also offer freeze protection while away.
Heat pump hot water heaters are insulated with an environmentally friendly non-CFC foam insulation. CFC is Chlorofluorocarbons which are used to propel the foam insulation onto a surface. They are recognized as a major contributor to ozone depletion. The Stratospheric ozone layer affected by the CFC’s helps protect the Earth and us from harmful ultraviolet rays. Therefore, the heat pump hot water heaters help save on electricity and protect the Earth from ozone depletion.
Another environmentally friendly aspect is the type of refrigerant used in self-contained heat pump units such as hot water heaters. The heat pump unit situated at the top of the hot water heater uses environmentally friendly R134a refrigerant. This type of refrigerant has zero ozone depletion. Lastly, each system has a safety feature called a dry fire protection control. This system checks to ensure water is present before firing the system. Therefore, it protects from burning up the elements prematurely.
Warranty and Other Useful Information
A conventional hot water heater typically last 8 to 12 years with the average warranty being about 6 years. The hybrid heat pump hot water heater typically last 13 to 15 years with a 10-year warranty. Not only does the system last longer, but the warranty also gives 4 extra years of peace of mind. As a bonus many manufacturers are offering rebates which helps reduce the price difference between a conventional hot water heater and the heat pump technology systems.
UEF is used to determine the efficiency of any electrical appliance. UEF stands for Uniform Energy Factor. In this case the UEF is the percentage of energy turned into hot water. The higher the UEF number, the unit will be more efficient and the less it will cost to operate. As an example, the typical UEF for electric hot water heaters is .65 – .95 and a hybrid heat pump hot water heater is 3.42 for a 50-gallon system, 3.52 for a 66-gallon system, and 2.73 for the 80-gallon system. Therefore, it is 300% more efficient than the conventional system resulting in lower heating cost.
How does a hybrid heat pump hot water heater last longer than a conventional system? Inside each system are anode rods. Anode rods attract the contaminants such as minerals and sediment in the water which protects the tank from corrosion. The ones inside the hybrid system are made with a stainless-steel core which last longer and offers better protection against corrosion. Inside the 66 and 80-gallon tank are two rods doubling the protection.
Things To Consider:
A hybrid heat pump hot water heater is taller than a conventional hot water heater. Make sure it will fit in the space designated. While the heat pump hot water heater is great for basements or garages it is best to remember that they are electrical equipment and generate noise. If installing in a small space, which can be done with an air duct adapter kit, think about if the noise will be bothersome. The noise is equivalent to a window A/C unit running. The systems become less efficient the lower the temperature is, therefore, if the area goes below 40°F consistently, it might be better to locate it in another place. Lastly, a little regular maintenance such as washing the filter will go a long way to keep the system running efficiently. Filter maintenance is minimal but important. Two times a year take a damp cloth and wipe the filter, then rinse it under running water and allow to air dry. This simple step will keep the filter clean and the system running efficiently.
Hybrid heat pump hot water heaters, while more expensive to purchase, offer greater savings on electricity cost. Thus, paying for themselves quickly. Deciding to use a heat pump hot water heater has many benefits and a few things to consider before purchasing. In other words, make sure a heat pump hot water heater will meet the hot water needs before purchasing. As always, use self-storage to help with any remodeling projects.

Storing electronics has its own challenges. Electronics covers a broad range of items; each type require their own storage needs. At one time electronics was a small selection of items like televisions, radios, and computers. Today there are electronic components in most of the items we use on a regular basis. Now it includes refrigerators, coffee pots, washers, dryers, air fryers, game systems as well as the traditional items. Therefore, it is best to store electronics according to manufactures recommendations. What if the original paperwork is missing or gone. There is some general guidance that can keep expensive electronics safe during storage.
Prepare For Storage
Firstly, if it has data and can be backed up, do it. Nothing is worse than storing a drive or gaming system and something happens during storage that wipes out the saved games, data, or digital photos. In other words, the best practice before storing electronics is to back them up if possible.
Secondly, before storing electronics they should be cleaned. Use a can of compressed air known as “canned air” and blow the dust and dirt from all electronic components. This may require removing the cover to access cooling fans and circuit boards. If not comfortable removing the cover take to a local technician who can clean it before storage. Next wipe down all screens with an antistatic cleaner. This will prevent dust from sticking to the screen while in storage.
Next, remove all cords, wipe them down to clean. Label and store the cords either in a separate tote or use a Ziplock bag and keep them with the electronic equipment it goes to. Use the method that works best for you.
Lastly, when storing electronics protect them. During transport and moving into the storage area is when the biggest risk of damage can occur. Bubble wrap provides an extra layer of protection. Cover all vents or access points to prevent dust from invading the equipment. If the original packaging is available this would be the best way to protect the electronics during storage. Keeping electronics protected should be the top priority.
Choosing Correct Storage
To store electronic equipment properly a few simple questions will decide the correct storage choice. What is the climate like? What time of year is it being stored? How long will it be stored? These are all important questions to ask before deciding where to store electronics.
Firstly, is it hot and humid where the electronics will be stored. If the answer is yes, only store electronics in climate-controlled storage. Moisture is bad for electronic equipment. It will cause corrosion, rust, short-circuiting when the device is used again. Humidity can cause an array of malfunctioning on electronic parts. Therefore, if storing electronics in humid climates only use climate control storage.
Next, what if the climate is cold or storage will be over freezing winter months? Most electronics are better off stored in cool, dry environments. The only exception to this general rule is if there is a chance of freezing. Do not store where freezing may occur. Liquid Crystal Displays (LCD) have the greatest risk of freezing which causes irreversible damage. LCD are commonly used for flat screen televisions, computer monitors, digital cameras, and camcorders, plus an array of handheld video game systems. Other places LCDs are used is for video projection equipment and electronic billboards. Chances are the screen on the refrigerator, stove, clock, or DVD player are all LCD. Protecting these expensive items when in storage is important. In other words, do not store any LCD devices where there is a chance of freezing.
Lastly, how long will the electronic equipment be in storage? If it will be in storage for a long time only consider climate-controlled storage. The longer it is exposed to big temperature swings, the greater the chance for damage. As mentioned, moisture and dust are the most damaging to electronic equipment in storage. Hence the need for a climate-controlled storage unit. The unit will be regulated so no big temperature fluctuations will happen. In climate-controlled storage if will not have a chance to freeze protecting all the LCD items.
If stored improperly
What to do if electronics are stored improperly. First, allow the equipment to warm up to room temperature over a few days’ time. This will allow all the moisture that will condense on the circuits to evaporate. Next, inspect the equipment for any visible signs of damage before using. Then use canned air to remove any debris and dust from the equipment. Afterwards, clean the unit to prevent mold and mildew from growing in the warmer temperatures. Lastly, plug in and watch for any malfunctions before putting back into use. Monitor for the next several days for any changes in functionality. If it malfunctions unplug and replace before it becomes a fire hazard. In other words, use caution when using electronics that have been stored improperly.
To summarize, storing electronics properly requires a little knowledge about the environment in which it is being stored, plus some simple maintenance to prevent damage. When we know that dust, moisture, and temperature play a vital role in keeping electronics safe, storing properly becomes a necessity. Protect your electronic investment with proper storage.
Recent Comments