Category: Tip’s, Tool’s & FAQ’s
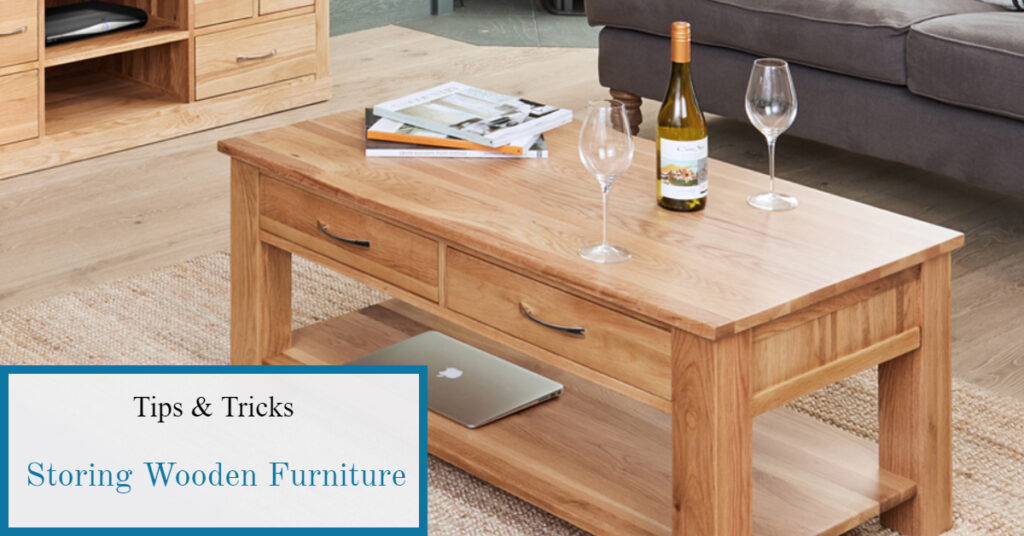
Keep your wooden furniture safe with correct storage. Whether moving, downsizing, or just looking to free up space, storing your wooden furniture helps it stay in top condition for years. This guide will help with choosing self-storage. It will help prepare for wooden furniture storage and the basic steps for furniture storage.
Section 1: Understanding Self-Storage
Self-storage is for people seeking extra space without moving to a larger house. These facilities offer secure and convenient options for storing furniture, including wooden pieces. Before you start on the storage journey, consider these key things:
1. Choosing the Right Facility: Select a self-storage facility with climate control and security features to protect your wooden furniture from temperature changes and possible theft. Look for a facility close to you. Check if they have the safety features you want. An on-site staff helps prevent theft.
2. Proper Packing Materials: Buy packing materials such as bubble wrap, furniture covers, and packing tape to protect your wooden furniture from dust, scratches, and moisture. Also, buy moisture packs to help prevent moisture in your storage unit.
Section 2: Wooden Furniture Storage Tips
Now that you have chosen the perfect location for self-storage, let us talk about the steps to store wooden furniture:
1. Take Apart if Possible: In other words, take your wooden furniture apart. It will save space and reduce the risk of damage during moving and storage.
2. Clean Thoroughly: Clean your wooden furniture before storing it. Dust and debris can cause scratches and damage over time. Use a gentle cleaner for the type of wood. Allow time for the wooden furniture to dry completely. Dry wood will prevent mold growth.
3. Apply Furniture Wax or Polish: Adding a layer of wax or polish helps save the wood. Wax or polish adds a layer of protection from the environment. Make sure the furniture is completely dry before waxing.
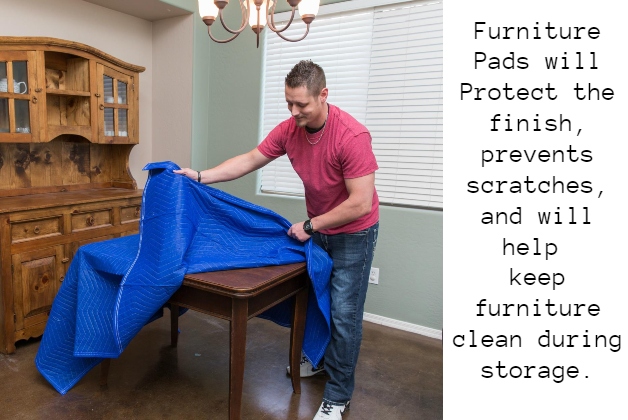
4. Use Furniture Covers: Cover your wooden furniture with the correct-sized covers. Furniture covers protect wooden furniture from dust and stop scratches, especially if the furniture is stacked close to each other.
Section 3: Preparing Furniture for Storage
Preparing your wooden furniture before storage is necessary for its long life. Follow these steps:
1. Remove Hardware: Take off any removable hardware. Hardware like knobs, handles, or decorative elements. Removing hardware prevents them from getting lost or causing damage during storage. A storage hint: place the hardware in a zip-style baggie and tape it to the back of the furniture. If the furniture has a drawer, put the baggie in the drawer and tape it closed. When it is time to put the furniture back together, the hardware is close by.
2. Wrap Fragile Parts: Use bubble wrap or foam padding to protect delicate furniture parts. Wrapping table and chair legs prevent damage.
3. Secure Drawers and Doors: Tape drawers shut. Secure doors with tape or straps to prevent them from opening during transport or storage.
In Conclusion
Storing wooden furniture does not have to be a scary task. You can keep your wooden furniture safe for years. Remember to choose a safe self-storage facility, follow correct storage methods, and prepare your furniture well. Proper furniture storage will guarantee that your wooden furniture is in top condition. In other words, storing your wooden furniture will help it last. Happy storing!

Self-storage questions commonly asked by a first-time renter. Self-storage is a great solution if extra space is needed. However, if it is your first time you may have several questions about self-storage. Questions like; what is the difference between drive up and climate-controlled units? What type of identification is needed? What is not allowed to be stored? These questions are often asked by new renters and their answers can be found below.
What is the difference between drive up and climate-controlled storage?
Typically, a drive-up storage unit is also called a traditional storage unit. This means an enclosed outside building with a garage-type door for each unit. The renter can drive up to the door and access the unit. Traditional storage units have no heat or cooling methods.
Climate-controlled units are found inside a building and are regulated for temperature and humidity. These units have the same type of doors but are enclosed inside a large building. The temperature is watched and is best for items sensitive to heat and humidity such as photos, antiques, and musical instruments.
Other types of storage are outside parking which is exactly as it says. A parking spot inside the gate for protection. Other types can be covered parking which would have a roof over the parking spot. Bomarc Self Storage does not offer covered parking and has limited availability on outside parking spots with time constraints due to winter snow removal.
What size units are offered?
Drive up storage typically starts at the small size of a 5×10 (which is the least expensive) and ranges to the larger size of a 10×30. In between these two sizes are the other sizes found such as 10×10, 10×15, and 10×20. Some places offer oversized storage spaces with higher-than-normal ceilings and extra width in a 12×20 or a 12×30 size.
Climate-controlled storage ranges from the smallest size of a 5×5 (the least expensive) unit to the largest unit of 10×20(the most expensive). The sizes in between these two are 5×10, 10×5, 10×10, and 10×15. Traditionally the ceilings are higher in a climate-controlled building than in the outside drive-up units.
What will fit in a storage unit?
Each size will hold a specific number of belongings. The best gauge is the size guide on our website: https://bomarcselfstorage.com/what-size-unit/what-fits. The industry standard is a universal guide, a 5×10 is like the size of a walk-in closet. A 10×10 will hold the contents of a 1-bedroom place. Then the 10×15 will typically hold the contents of a 2-bedroom place. Lastly, a 10×20 will hold the contents of a 3–4-bedroom place. It is best to rent a unit one size larger than you think you need. Especially if there is any question about fitting all the possessions in a unit or if you have extra furnishings, or oversized items. When talking about self-storage, it is in your best interest to have more space than not enough.
What kind of padlock do I need?
When it comes to security, a good padlock is needed. A standard padlock works to satisfy the lease requirements but what if you want more protection? The disc lock is recommended by most insurance companies offering self-storage rental insurance. Read the insurance form carefully as they all require a certain type of lock for their coverage to be valid. Disc locks are recommended because they are difficult to cut quickly. It requires a noisy grinder and thieves like to be quiet. There are many diverse types of padlocks on the market from simple key locks to ones that require pass codes to unlock them. Finding one you feel your possessions are safer with would be the best one to choose.
What type of ID is needed to rent a storage space?
At Bomarc Self Storage you must be at least 18 years old and provide us with a form of government-issued identification such as a State Driver’s License or state issued ID. Another form of identification would be a passport.
How do I pay for Self-Storage?
We like to offer a wide range of payment options to make paying for your storage unit a breeze. At Bomarc Self Storage you can come in to pay in person, drop a check in our convenient Drop-Box, pay over the phone, use our easy online payment portal or use AutoPay to never forget your payment again. We accept money orders, checks, American Express, Discover, Mastercard, and Visa at all our locations.
Do I need insurance?
Many self-storage facilities require insurance to store your items with them. We highly recommend buying an insurance policy while your items are being stored. The coverage is an added piece of mind for your possessions against unforeseen incidences such as break-ins, storm damage, structure failure, or other emergencies. We offer insurance or you can check with your homeowners or renters’ policies to see if they cover off-site storage. If not, we can add storage insurance at any time.
When can I move my stuff in?
Once you have signed a lease you will have access to the facility. If you are renting online, you will receive a secondary email with how to access the gate. If you are renting in person, you will receive personal instructions on the gate process as well as directions to your unit. In other words, as soon as the lease is signed you have access.
What hours do I have access to the facility?
Bomarc Self Storage allows 24/7 access to the facility with your secure gate code. Each code is unique to a renter. For example, one code might be 4 digits long and another 10 digits long. The best part is you choose a code that is easy for you to remember. Our staff is available M-F 9am to 5pm to answer your questions and help you. All locations are well lite with 24/7 video surveillance and keypad access only.
May I look at a unit before deciding?
“May I see a Unit?” is one of the most often asked questions at Bomarc Self Storage. Most self-storage facilities will offer a tour during business hours. We recommend calling our friendly staff and scheduling a tour. We offer tours 9am to 5pm Monday through Fridays.
What kind of notice do I give when I am moving out?
Each storage facility will have its own requirement for a move out notice. Some are 30 days and others are 15-day notices. However, Bomarc Self Storage only needs a 10-day written notice before vacating a unit. To make it easier for our tenants and their busy lifestyles, an email notice is the best choice. A quick simple email that states “I will no longer need my unit after” works the best.
What security measures are in place here?
All the Bomarc Self Storage facilities have cameras, keypad access to the gate, and lots of lights for nighttime security. Our facilities with climate control have keypad access only to the buildings. Each person has their own unique code. During the day on site staff bring an added layer of protection.
Are there restrictions on what can go in a unit?
Most self-storage facilities will have a list of items that are not acceptable as storage items. These are money, priceless jewelry, firearms ammunition, and perishables. At Bomarc Self Storage our list includes food items like sugar, flour, cereal, rice etc. This list extends out to dry cat food, dog food or wild bird seed. Rodents are attracted to these items, and we do all we can do to discourage a rodent population. Our pest control guys would be incredibly grateful for your help in this fight. We also do not allow toxic chemicals, explosives or any living in the units.
Each storage place will have its own list of items not allowed. They may have different security measures in place as well. Therefore, it is best to call and ask these questions before renting a unit.

Preparing furniture for storage is critical. Furniture is expensive. Not preparing it properly before storing, will ruin the furniture. Who has the extra money to replace ruined furniture. There are several things that can be done to prevent damage. As with anything going into storage, furniture takes a little prep work. Firstly, knowing what types of materials the furniture is made from is important. Next, what types of cleaners work best on the material. Then the proper way to clean it. Lastly, once it is cleaned and dried what final steps can be taken to protect the furniture going into self-storage. Therefore, preparing furniture for storage will help save your investment.
Materials:
Furniture comes in many styles and materials. First it is important to know what type of material before cleaning. For example, wood requires a few steps, but plastic or plastic resin furniture is a wash and dry method.
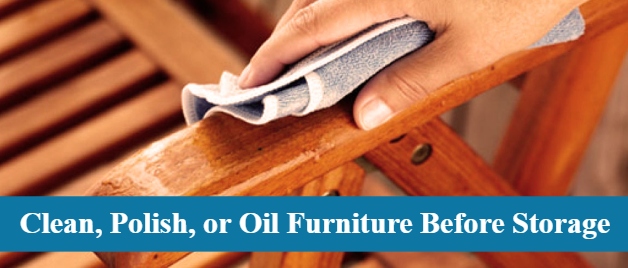
Wood furniture should be dusted first with a damp cloth. Next, wash with a mild solution of soap and water. Murphy’s oil soap is a great cleaner for all types of wood. Then allow to thoroughly air dry. Lastly, oil or polish furniture. Cleaning ensures that no contaminants like food or mold and mildew follow your furniture into storage where unchecked they can damage wood.
Resin or plastic furniture should be dusted first. The best method is with a vacuum cleaner and the soft bristled brush attachment. Especially as most resin furniture is textured. Next mix a solution of mild detergent and water. Hose down the furniture and then wash with the solution. Then rinse thoroughly and allow to completely air dry. If the hose option is not feasible, hand wash the furniture. Then use a sponge and clear water to rinse. Be sure to rinse sponge several times to remove all the detergent.
Metal furniture is easy. Inspect for rust and remove as this will continue to oxidize during storage. Next, wash with a mild non-detergent soap, rinse, and completely dry before storage. If the rust removal took place, repaint the damaged area to further protect the metal.
Leather furniture should be stored in climate controlled; leather is extremely porous and will succumb to moisture and heat. If climate controlled is not available be sure to use a good leather cleaner and follow with a great conditioner. Accessing the storage unit a few times a month will allow fresh air to circulate through the unit helping keep the unit dryer.
Cushions or Fabrics:
Cushions come in two kinds, removable covers and non removeable. If the cover is removable, remove it and wash in the washing machine. Then prepare a solution of mild soap and water in a bucket. Wash the inserts and rinse thoroughly squeezing as much water as possible from them. Allow them to air dry. It is particularly important to allow them to dry completely. They will mildew in storage if not completely dry.
Non removable covers take a little extra work. Sometimes the best option is to use an upholstery cleaner, for the fabrics that can be cleaned with one. If after the patch test the material shows it should not be cleaned with an upholstery cleaner, it will require hand washing. A patch test is recommended if the material has never been cleaned before with an upholstery cleaner. The patch test consists of testing a small area first to see if it damages the material.

If a patch test shows you cannot use upholstery cleaner follow these steps to clean the cushions. First, brush any crumbs, dirt, or loose material from the cushion. Next, mix a solution of mild soap and warm water. Then wet the cushion and brush gently with a soft bristled brush to remove any stains or grime. Once the exterior of the cushion is cleaned, gently submerge the cushion in the solution and squeeze. Remove from the water and rinse in clean water until there is no more soap in the cushion. Finally, allow to air dry until the cushion is thoroughly dry.
For best storage of cushions, wrap in plastic or if they are too large then place them together and cover them with a tarp, sheet, or other covering to protect them from dust.
Glass Tops:
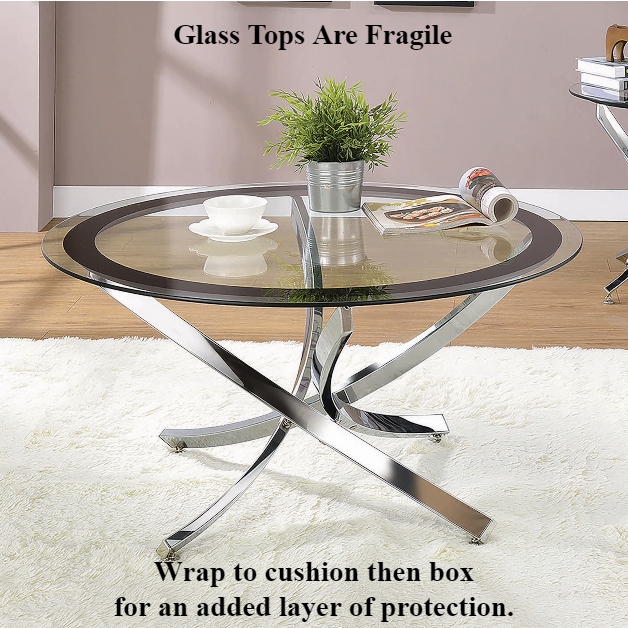
Glass comes with its own cleaning requirements. Use cotton gloves to avoid greasy fingerprints. Grease can cause mold and mildew when being stored. Clean the glass and remove it from the base if possible. Wrap the glass in a protective layer. You can use bubble wrap, furniture pads or blankets. If the top is round, use cardboard to create a box for the wrapped top. This will help prevent rolling and add an extra layer of protection.
Storage Hints:
Now that the furniture is clean and thoroughly dry. Let us look at how to prepare the furniture for self-storage. First, is the furniture easy to disassemble? If it can come apart take it apart! This step will save space in storage. For example, a table taken apart will require less space to store than if it was fully assembled. Next be sure to secure all hardware to assemble the furniture in a zip lock bag and tape to the backside of the furniture. When it comes time to assemble the furniture after storage everything you need will be with the furniture.
Next, if the furniture has drawers, such as a bureau, take them out. Moving the furniture will be easier. Once it is in storage put the drawers back. Do not forget to use that extra space for storage! This will provide an extra layer of protection for fragile items. To utilize this space, wrap fragile items in bubble wrap and pack into the drawer, then close the drawer. Any added layer of protection for fragile items is a bonus!
Lastly, for items such as couches, cover the couch with a sheet, or other covering. This will help keep the couch from getting dusty. Also, it is best to add a dryer sheet or two to help keep the couch smelling fresh. When the items come out of storage allowing them to spend a little time in the fresh air and sunshine will assist in freshening them up.
Added protection:
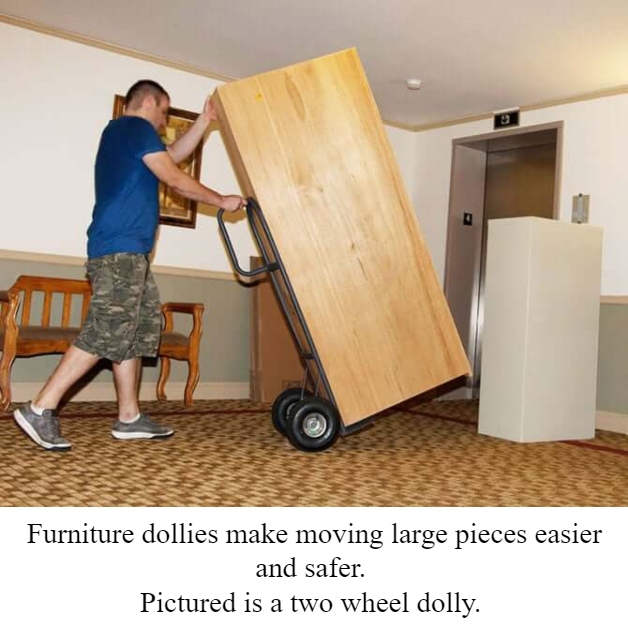
During the moving process damage can occur to furniture. Things like scraps to the finish, a leg can break off, or any number of things can happen. One of the best ways to prevent damage is to use furniture blankets. These handy blankets will protect finishes and can be used as covers in storage to prevent scratches and dust.
Another moving must, especially for sizable items is the furniture dolly. These come in several sizes and styles to assist in moving furniture safely. One is a two-wheel dolly. These are great for moving midsized items.
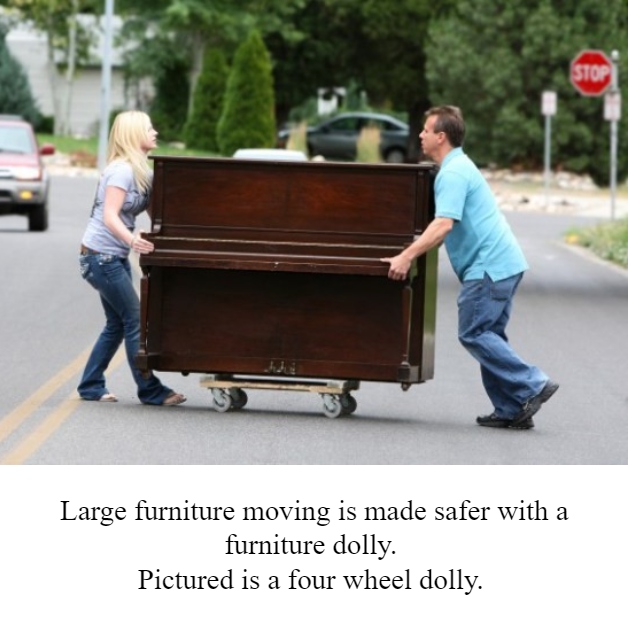
Next are little four-wheeled dollies. These can be used individually or in combinations based on the size of the furniture. They make moving bulkier pieces a breeze. Therefore, If the item is an oversized piece, consider renting a furniture dolly to assist with moving.
If the furniture has any value, go with a climate control unit. The units are controlled to prevent excessive temperature changes which can damage wood, leather, and other materials. When the furniture is less than valuable and will be stored for a brief period, an outside drive up or traditional storage unit will work. As always, make sure the items in self-storage are covered with a homeowners or renters insurance policy. If not, purchase it at the self-storage location.
In other words, everything done to prepare furniture for storage is a step towards protecting your investment. A little prep work and insurance goes a long way towards making sure the money spent on furniture is not wasted.

How to store photographs correctly is an important question. It is particularly important when trying to keep old family photos in decent shape. In today’s digital world the storage needs for images is vastly different from those of a traditional photo. Take the first images created in the early 1800’s. These images were on a polished silver or glass sheet. Therefore, they have unique needs, different than a modern photograph. Despite their differences most photographs have similar handling and storage needs. Also, there are three very damaging conditions for photo images. Avoid these conditions when storing photos of any kind. The conditions are direct sunlight, moisture, and extreme temperature changes. These all will cause damage to your stored photographs. How to store photos correctly depends on the type of photo it is.
First, let us look at how to safely handle a photograph. When handling photographs of any type be sure to have clean dry hands. Do not touch the image. Use cotton, lint free gloves for the best protection. It is best to handle photos by their edges. Particularly because the natural oils in our fingertips will break down the photograph over time. Likewise, keep food, drinks, and children away from the images.
Next, there are some general things you can do to protect an image. For example, use a number 2 pencil to write information on a photograph. Markers and ink pens will bleed through the image over time. Also, the chemicals in the ink will damage the image. Number 2 pencils are graphite and will not bleed though to the image and will last forever. Then protect the image in an acid free sleeve and store where the temperature and humidity are controlled. Climate Controlled Self Storage is an ideal solution for photograph storage.
Types of Antique Photos and How to Store Them:
Daguerreotype (/dəˈɡerəˌtīp/)
From 1840 until 1860, these photos were popular. The mirror-like image is on a polished silver sheet. These photos are small, typically 2.75 inches by 3.5 inches, with a protective case. They are fragile and should not be exposed to direct sunlight. Direct sunlight and extreme temperatures will cause damage. Therefore, climate-controlled storage is best for these photos.

Ambrotype (ăm′brō-tīp′)
From 1855 until 1865, brought the popularity of the Ambrotype photograph. The image is created on a glass sheet instead of the polished silver sheet. The other difference is that they do not have the mirror-like reflection. Plus, they are kept in a hinged case. Climate controlled storage is recommended because these images are fragile.

Tintypes (ˈtintīp)
1855 until the 1900’s, tintypes were popular. They were on iron plates instead of glass or polished silver sheets. Tintypes were durable which is why they were popular for over 30 years. The tintype started out with hinged cases but soon were kept in paper sleeves or envelopes. They had delicate surfaces that could scratch easily.
Cartes des Visites (kärt də vēˈzēt)
From 1859 through 1870, Cartes des Visites was in demand. Cartes des Visites are albumen printed and mounted on thick paper. Albumen printing is egg white and silver nitrate spread on a paper. This forms a light sensitive layer. A glass negative is put on the paper and light is cast over the image. These were popular during the Civil War.
Cabinet Cards
From 1860 through the early 1920’s, cabinet cards were the photograph of choice. They were larger than the Cartes des Visites. Although, the images were created the same way, stiffer cards were used. This allowed the photographer’s information and advertising to be applied to the back.
In 1900, Kodak introduced the first camera to be sold to the public. This changed photography, it became a popular hobby for many. With this change came another challenge on to how to store photographs properly.
How to Store Modern Photographs
After the introduction of the Brownie Camera photography equipment and technology changed quickly. One thing that has not changed is the process to protect them. All the rules above still apply today to any printed photograph. With the introduction of photo albums and scrapbooks came a new threat to photos. Many of the papers or sleeves used were not archival safe. The glue in the photo corners used to secure photos to the paper caused damage. Over time better acid-free paper and photo safe glues were developed. Therefore, when shopping for an album or scrapbook check that it is acid-free. Protecting photos before storage is as important as when they are being stored.
First let us look at storage solutions. Today there are a lot of storage containers for photos. Acid-free boxes, plastic totes, photo albums, and scrapbooks to name a few. As mentioned above, be sure to check that all options are archival safe. The last thing anyone wants is to accidentally ruin photos in storage because the wrong method was chosen.
Next, is the proper way to store pictures in their box. Standing the photo up protects the image. Stacking the images one on top of the other causes warping and the images to stick together. Standing keeps them safe from warping over time. If the box cannot be filled so everything is standing, use a filler to keep them on their edge. If you must stack the images, only stack a few on top of each other. Always keep the negatives with the photos if one becomes damaged it can easily be replaced. Hint: using an acid-free index card as a divider helps keep the images organized and protects them from sticking together.
Last, knowing light, moisture, and temperature all cause damage over time, choosing the best location is important. The attic is not a good place due to the wild temperature changes that happen. Likewise, the basement will have moisture issues. A closet inside the house will work but the best option is climate-controlled storage. Climate-controlled storage is kept within the correct temperature and humidity range. In other words, to protect your photos choose climate-controlled storage.

How to store instant/polaroid images.
As photography advanced along came the instant photo. It was wildly popular because you had your image instantly or within a few minutes. The film came coated with the chemicals needed to process the image. This presented a different problem because the chemicals could dry out over time. It was recommended to refrigerate the film to slow down or prevent this from happening. Freezing the film did not extend the life of the film instead it caused the chemicals to crack inside the film. Once the picture was taken it slowly developed. The colder the film was when the photo was taken, the better the quality of the picture was after it developed. The cold film slowed down the chemical process.
Correct storage of these instant images was important to maintaining them. It soon became apparent that light and heat where the biggest dangers. Heat and sunlight caused the images to warp and change color. If left exposed to these conditions long enough the image would disappear from the photo. Therefore, the ideal storage is in an album or upright in a box protected from light and heat. A dark closet or a climate-controlled storage unit are the best options for storing instant photos.
How to Store Digital Photography
In 1990 an innovative technology joined the photography family. Digital photography debuted and took the world by storm. Within ten short years it was on every cell phone. This put a camera in the hands of 7.26 billion people worldwide today. With the development of digital images, no longer did you have to wait for the film to be developed. The image was available instantly. It did not cost anything to develop it nor to share it. They could easily be manipulated with photo editing software to create stunning images.
This overabundance of images held its own issue. How do you store so many images safely? First, each device has a storage card. It was easy to download the images onto a computer for safe storage. But was it truly safe? Computers can die and with it all your important photos. As a result, hard drives separate from the computer were developed. Now you could download all the thousands of photos onto an external hard drive and keep them safe.
Next, there are many thoughts on the proper storage of digital images. One such rule is to keep the original SD card from the camera or phone. Use the little tab on the side to lock the card so it cannot be overwritten. This can be expensive if you take hundreds of pictures a day. Therefore, the next rule might work best for you.
Second method is to download the images onto a computer. Organize them, then copy them onto the external hard drive. This method works best if you take many pictures every day. The thought is if you lose the SD card, the image is on your computer. If the computer dies the image is safe on your external hard drive.
Lastly, if every image is not a keepsake for you, choose the best image or images of the day. Then delete the others. Have the best image printed or developed. Then download the images onto your external hard drive. Display your best or store them with the external hard drive. This brings up a good question, where is the best place to store an external hard drive?
External hard drives have a few enemies. The number one is static with moisture being a close second. Store external hard drives in an anti-static storage bag. Once in the bag they can be stored anywhere. The only exception is if you are storing an original with the hard drive if so, choose an appropriate location for the safety of your original.

Summary
As seen photography has been popular for hundreds of years. Therefore, preserving the images across the ages is important. Keeping all forms of photography safe is important for having images to show to future generations. The best option is climate-controlled storage to preserve the past for future generations.
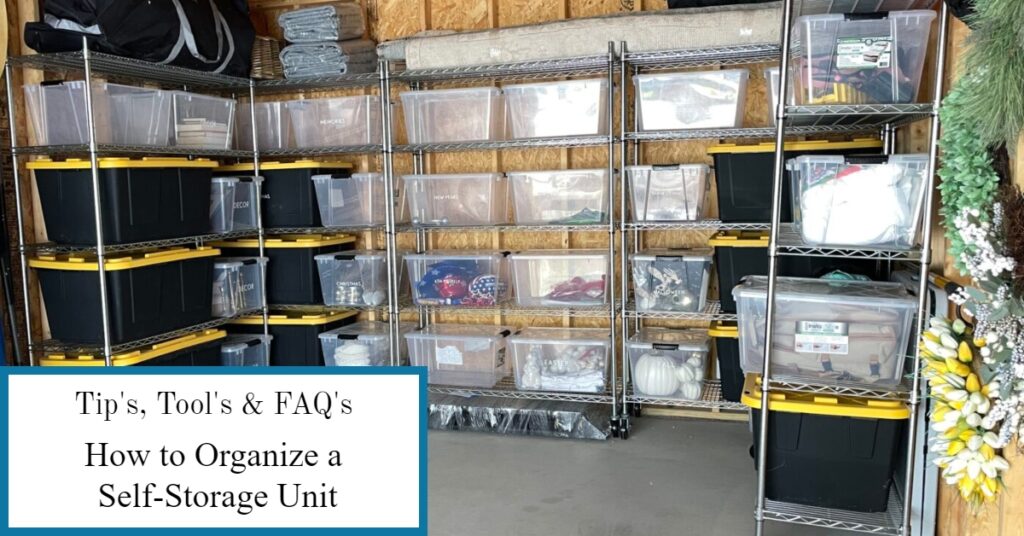
Self-storage organization can save time and frustration. Imagine opening a self-storage unit and easily finding the item you are looking for. The only way this will happen is with organization. Most storage units are not organized, nothing is more frustrating than needing something and it is in a box at the back of the unit. Recovering this item requires emptying the unit to find the item then packing it all back into the unit. Who has time for this? Therefore, organization of a self-storage unit saves time and frustration.
Organize for Resale Business
First step is to determine the size unit you will need. A space estimator guide (found here) is a great tool to help determine the correct size self-storage unit. Next decide how much extra space you want. Then choose the unit size that will allow you the level of access you need. As a reseller you may need to access the storage unit daily. Being ultra-organized will save you time and money. Lastly decide how you will organize with shelves, labels, and bins.
Now that you have an idea how you want it set up work up a plan-o-gram. A plan-o-gram is a diagram of where items are on a shelf. A plan-o-gram is a terrific way to know where items are located. A plan-o-gram will be labeled in sections and shelves will be numbered as well as the bins will need to be numbered. For example, the first section of the shelves could be labeled A, the next section B and so forth. Then each shelf in the section could be numbered 1, 2, 3 and so on. The bins could be numbered the same way. Therefore, if you were looking for an item and it was in Section C, self 3, bin 5 you would know exactly where to go to find that item. This is a huge time saver. Imagine having to spend hours looking through bins to find an item. Instead have a plan of organization that will help you spend less time looking and allow more time for shipping and selling. In other words, taking the extra time at the beginning to set up a system will save you time and money on the other end. Safety hint: store heavier items on the bottom shelves.


Organization for an Individual
The same method of organizing will work for an individual as well. The only difference is that you could label the boxes and decide that Section A is for Kitchen items. All kitchen items will then be stored in section A. Next Section B could be the living room boxes. As you build each section label it with the room being stored on those shelves. Therefore, the plan-o-gram would be simpler.
The benefits will far outweigh the cons. Imagine having to find the gift your sister gave you for your last birthday. She is coming for a visit and will expect to see her gift in use. Sisters are like that sometimes. The gift is in self-storage, and you have no idea what box it is in. This might require hours to empty the unit and go through the boxes looking for her gift. Imagine instead knowing it is in Section G and the box it is stored in is clearly labeled on the outside. Having a plan sure saves time and frustration.
Now it is time to move into a new home. The next benefit of having a highly organized self-storage unit will be very evident on moving day. All the boxes for the kitchen will be together and clearly labeled. The moving company, if using one, can clearly see that the box belongs in the kitchen. This saves time and your money.
Lastly, having an organized self-storage unit for a reseller is a necessity. The time it saves translates into money. Having an organized self-storage unit as an individual is purely a convenience. If you have the time to spend looking through boxes for items you need, organization will not be necessary. But if you are a busy person and have little time for a game of hide and seek with your possession’s organization is critical. Therefore, having an organized self-storage unit will save you time and frustration.

Storing electronics has its own challenges. Electronics covers a broad range of items; each type require their own storage needs. At one time electronics was a small selection of items like televisions, radios, and computers. Today there are electronic components in most of the items we use on a regular basis. Now it includes refrigerators, coffee pots, washers, dryers, air fryers, game systems as well as the traditional items. Therefore, it is best to store electronics according to manufactures recommendations. What if the original paperwork is missing or gone. There is some general guidance that can keep expensive electronics safe during storage.
Prepare For Storage
Firstly, if it has data and can be backed up, do it. Nothing is worse than storing a drive or gaming system and something happens during storage that wipes out the saved games, data, or digital photos. In other words, the best practice before storing electronics is to back them up if possible.
Secondly, before storing electronics they should be cleaned. Use a can of compressed air known as “canned air” and blow the dust and dirt from all electronic components. This may require removing the cover to access cooling fans and circuit boards. If not comfortable removing the cover take to a local technician who can clean it before storage. Next wipe down all screens with an antistatic cleaner. This will prevent dust from sticking to the screen while in storage.
Next, remove all cords, wipe them down to clean. Label and store the cords either in a separate tote or use a Ziplock bag and keep them with the electronic equipment it goes to. Use the method that works best for you.
Lastly, when storing electronics protect them. During transport and moving into the storage area is when the biggest risk of damage can occur. Bubble wrap provides an extra layer of protection. Cover all vents or access points to prevent dust from invading the equipment. If the original packaging is available this would be the best way to protect the electronics during storage. Keeping electronics protected should be the top priority.
Choosing Correct Storage
To store electronic equipment properly a few simple questions will decide the correct storage choice. What is the climate like? What time of year is it being stored? How long will it be stored? These are all important questions to ask before deciding where to store electronics.
Firstly, is it hot and humid where the electronics will be stored. If the answer is yes, only store electronics in climate-controlled storage. Moisture is bad for electronic equipment. It will cause corrosion, rust, short-circuiting when the device is used again. Humidity can cause an array of malfunctioning on electronic parts. Therefore, if storing electronics in humid climates only use climate control storage.
Next, what if the climate is cold or storage will be over freezing winter months? Most electronics are better off stored in cool, dry environments. The only exception to this general rule is if there is a chance of freezing. Do not store where freezing may occur. Liquid Crystal Displays (LCD) have the greatest risk of freezing which causes irreversible damage. LCD are commonly used for flat screen televisions, computer monitors, digital cameras, and camcorders, plus an array of handheld video game systems. Other places LCDs are used is for video projection equipment and electronic billboards. Chances are the screen on the refrigerator, stove, clock, or DVD player are all LCD. Protecting these expensive items when in storage is important. In other words, do not store any LCD devices where there is a chance of freezing.
Lastly, how long will the electronic equipment be in storage? If it will be in storage for a long time only consider climate-controlled storage. The longer it is exposed to big temperature swings, the greater the chance for damage. As mentioned, moisture and dust are the most damaging to electronic equipment in storage. Hence the need for a climate-controlled storage unit. The unit will be regulated so no big temperature fluctuations will happen. In climate-controlled storage if will not have a chance to freeze protecting all the LCD items.
If stored improperly
What to do if electronics are stored improperly. First, allow the equipment to warm up to room temperature over a few days’ time. This will allow all the moisture that will condense on the circuits to evaporate. Next, inspect the equipment for any visible signs of damage before using. Then use canned air to remove any debris and dust from the equipment. Afterwards, clean the unit to prevent mold and mildew from growing in the warmer temperatures. Lastly, plug in and watch for any malfunctions before putting back into use. Monitor for the next several days for any changes in functionality. If it malfunctions unplug and replace before it becomes a fire hazard. In other words, use caution when using electronics that have been stored improperly.
To summarize, storing electronics properly requires a little knowledge about the environment in which it is being stored, plus some simple maintenance to prevent damage. When we know that dust, moisture, and temperature play a vital role in keeping electronics safe, storing properly becomes a necessity. Protect your electronic investment with proper storage.
Let’s face it, a mattress is an investment. It is a financial investment for your sleep and overall health. A good mattress takes time and energy to find. Once you find a good mattress in Ellsworth, Maine, you want to protect it and extend the life of your mattress for as long as possible. So what do you do if you find you must store your mattress. What is the best self storage option for your mattress? Taking a few steps to protect your investment just makes sense. Following are four tips for storing your mattress.
Mattress Storage Tip #1: Cleanliness is Mandatory
Take a little time and thoroughly clean your mattress. A clean mattress will resist mold and mildew from developing during storage.
- Vacuum thoroughly using the upholstery attachment cleaning every crack and crevice.
- Remove stains with upholstery cleaner following the manufacturer recommendations. (See DIY methods and Memory Foam Mattress recommendations below)
- Allow to dry and sprinkle with baking soda, let it set overnight if possible.
- Vacuum baking soda off Mattress
- Flip mattress and clean the other side using steps 1-4
Certain stains require a different approach. Biologic stains like urine, blood, vomit, sweat and other bodily stains are best approached with an enzyme based cleaner. Spray enzyme based cleaner on a clean cloth and blot the stained area. Remove the cleaner with a clean cloth dampened with cold water until the stain lifts.
DIY Tip: Mix up some dish detergent and water but only apply the foam from this mixture to the stain, remove soap with a dampened cloth of cold water. Another solution is a 50/50 mixture of cold water and hydrogen peroxide. This works great on blood.
Memory foam has become the most popular type of mattress. Memory foam isn’t supposed to be wet, so clean with caution. All the methods above will work on memory foam mattresses but work on the principle; less is more. If you should accidentally use too much moisture in cleaning your memory foam mattress, sun and fresh air is the best practice for thoroughly drying before storage!
Mattress Storage Tip #2: Protection
The best protection is a plastic mattress cover. Once your mattress is dry from cleaning, install a plastic cover. This will prevent moisture from humidity or other sources from damaging your mattress. PRO TIP: add a few of your favorite scented dryer sheets in with the mattress. The fresh scent will discourage pests and be a welcome addition when you remove it from self storage.
Mattress Storage Tip #3: Self Storage Duration
A few things to consider before choosing a self storage unit, will it be a short term storage situation of 3 months or less, or will it be stored for longer. For under three months a drive up storage will work but for anything longer than that use climate controlled storage! Climate controlled storage offers greater protection against humidity. Pro Tip: If you store in an outside drive up storage unit, stop by your unit once a month and open the doors for about 15 to 20 minutes. This will change the air and allow any moisture that may have accumulated to evaporate. Unzip your mattress cover and check for any dampness, the fresh air will keep your mattress fresh smelling.
Mattress Storage Tip #4: Correct Storage
To prevent any damage to your investment it is recommended that the mattress be stored flat with nothing heavy on it. If you have room, lay the mattress on the floor and stack other mattresses on top. If you need all that space, create a flat platform with your totes and boxes to put your mattress on top of. The goal is to prevent any structural damage to the inside material. Nothing would be worse than putting the absolute most amazing mattress in storage and when you take it out, find that the boxes or other items that were stored on top of the mattress rendered it useless. What if you need all the space and laying the mattress flat is not an option. If it’s a short term storage you can prop the mattress on its side, flat against a wall. Make sure it is straight with no bends or sags! A bend of sag will damage the structural material inside your mattress. TIP: If you have a box spring you can wedge the mattress between the box spring and wall to assist in keeping the mattress straight. Speaking of box springs, they can be stored on their side as they have no coils or other structural material to damage!
When it comes time to remove your mattress from self storage, open the protective cover and air the mattress out in the sun and fresh air. Sunshine is great, the UV rays kill mold or mildew spores and any moisture that may have invaded your mattress. If by chance there is a lingering odor from storage you can retreat with baking soda. Baking soda absorbs moisture and odors! Vacuum after allowing the baking soda to sit on the mattress for several hours and reassemble your bed. Make your bed with your favorite sheets and bedding to reacquaint yourself with your favorite mattress!

Vehicle Storage comes with several questions. First, what size unit will be needed to store a vehicle? Next, what needs to be done to the vehicle before storage? Then, does the self-storage facility have any specific requirements to store a vehicle? Lastly, how long will the vehicle be stored? Knowing the answers to these questions will help decide the best choice for vehicle storage. Therefore, ask these questions before deciding on a storage unit for a vehicle.
What Size Storage Unit Is Needed For Vehicle Storage?
The best answer to this question lies with; “What size is the vehicle?’ Most people have no idea how long their vehicle is without taking a tape measure and measuring the vehicle. Is there a faster way to figure out the size storage unit needed for vehicle storage? There is! It comes down to a couple of simple questions. Is it a car or a truck? Does it have two doors or four?
If the answer is a two-door car, then the storage unit will need to be at least a 10×15. If the answer is a four-door car, then the unit will need to be at least a 10×20. Lastly, if you said a truck, the smallest unit is a 10×20 as all trucks are over fifteen feet in length. A 10 by 20 will accommodate most passenger trucks.
What Should Be Done To A Vehicle Going Into Storage?
A little prep work before a vehicle goes into storage can save time when it comes to taking it out of storage. A quick trip to the mechanic can give you peace of mind. Let the garage know this is a pre storage checkup. The mechanic will check the following things.
- Test the battery (a weak battery can go flat and freeze in the winter making it useless)
- Verify the antifreeze is at a satisfactory level for the geological location
- Change the oil (having fresh oil helps with lubrication)
- Check the tire pressures
PRO HINT: If the vehicle inspection runs out during the storage time, ask the garage to perform an inspection. Therefore, it will not be an issue when the vehicle comes out of storage
What Can The Vehicle Owner Do To Protect The Vehicle During Storage?
Now that the garage or the DIY’er has completed the pre-storage inspection, what else can be done to protect the vehicle? For added protection complete the following steps. It seems like a lot but ultimately the preservation of the vehicle while in storage is the most important thing. It will be worth the extra effort.
- Wash and wax the vehicle to protect the finish.
- Clean all food containers or crumbs from the vehicle to prevent rodents from invading.
- Add rodent protection. Use moth balls or dryer sheets in the interior and engine compartments of the vehicle. (Shaved Irish Spring Soap is another great alternative)
- Use a rubber protect on the tires to prevent cracking while in storage
- Lay down a plastic sheet or super absorbent pads under the engine compartment. (Most self-storage facilities require some sort of protection for the floor and to help protect the other tenants from leaking fluids from a stored vehicle. This protects the vehicle owner as they will be responsible for any spills)
- If using a vehicle cover be sure it is made from breathable material. Moisture trapped under a cover not breathable will cause damage to the finish.
- To prevent mold and mildew in the trunk, purchase and install some water absorbent tubes that are mildew resistant.
- Purchase and use Fuel Stabilizer.
DAY OF STORAGE:
- Fill the gas tank ¾ full and use the fuel stabilizer (this protects the gas from breaking down while in storage. Fuel starts to break down after 30 days (about 4 and a half weeks))
- Lay down the plastic sheet or absorbent pads and drive the vehicle into storage.
- Disconnect the battery unless the manufacturer recommends not to because of the onboard computers.
- Install the water/mildew absorbent tubes in the trunk as well as the rodent repellent of choice.
- Roll up the windows and use the rodent repellent of choice in the interior.
- Install rodent repellent of choice in the engine compartment.
- Verify the keys are not inside the vehicle.
- Make sure the parking brake is off, if a standard shift vehicle, that your wheels are blocked to prevent rolling.
- Cover the vehicle if using one.
- Lock the storage unit.
Are There Any Special Requirements For Vehicle Storage In A Storage Unit?
Most self-storage facilities will have specific requirements for vehicle storage. These requirements can range from proof of ownership, proof of valid insurance, pictures of any damage prior to being stored, drip pan or absorbent material under the engine area. Each storage facility will have their own requirements. It is best to check the requirements before renting a unit.
How Long Will The Vehicle Be In Storage?
This may not seem important, but it is particularly important. Vehicles stored longer than a year need extra prep at storage time. These things could be overlooked and would cause an issue when it came time to remove the vehicle from storage. Based on manufacturer’s requirements, remove battery for storage in a warm location. If the battery cannot be removed a battery tender or trickle charger will need to be installed to keep the battery charged. Check with the storage facility before renting to see if they offer units with electricity. Another major difference will be jack stands. These will alleviate the possibility of flat spots on the tires from long term storage. The weight of the vehicle can cause flat spots making the tires unusable when it comes time to drive it again. Then there is the possibility of engine rust. To prevent this, use an engine oil additive like Lucas Oil or TriboTEX Engine. These products have superior lubrication and remain on the engine components to prevent rust and dry starts. If possible, coming to start the engine periodically will prevent all the oil from draining away from the engine components and avoid rusting. While there check on the moisture tubes and replace if necessary to prevent mold and mildew. Freshen the rodent repellent when needed and consider installing small screen protectors over the exhaust and on the air intakes to prevent mice from invading your vehicle.
These steps may seem extensive but when it comes time to remove the vehicle from storage the benefits will be clear. As always before starting your vehicle remove all rodent repellent from the engine compartment and any screens used on the exhaust and air intakes. Check the tire pressures before removing jack stands or driving. In other words, doing all the prep work before storage will save time at the end of storage allowing the owner to drive away and enjoy more time on the open road.

Whether you live in Bangor, Brewer, or Ellsworth, Maine when it comes to your metal patio furniture the extreme Maine weather can wreak havoc on it. Storing it outside will shorten the life of your furniture exposing it to extreme cold and being ice caked for months on end will compromise the integrity of the metal. Self storage is a great option to protect your metal patio furniture when the garage, basement or leaky shed out back are no longer viable places for storage. To properly store your metal patio furniture will require a little prep work depending on the type of metal used for your furniture. Proper cleaning and repair are your best weapons for maintaining the new look of your furniture.
General Metal Cleaning Tips:
First let’s address mold and mildew on your metal furniture. On most metal surfaces mold and mildew are easily removed with a good washing using a solution of warm soapy water. Have you ever noticed that mold and mildew can stain your furniture? To remove this stain is easier than you might expect. Mix a solution of water and white vinegar in a 50/50 mixture. Simply spray the solution onto the affected surfaces. Let this sit for about 30 minutes before rinsing with clear water. Towel dry the surface and allow it to thoroughly air dry before storage. Moisture is needed for mold and mildew to thrive. White vinegar is the best cleaning solution to kill mold and mildew spores because the PH level is typically 2.5 which is extremely acidic. While mold and mildew need a slightly acidic environment to grow, white vinegar’s extremely acidic formula is perfect for killing mold and mildew.
Most metal surfaces are easily cleaned, first wash away any large debris with a hose. Use soapy water to thoroughly clean all metal surfaces. Rinse the soap from the metal and dry with a soft cloth, microfiber cloths are great for drying metal furniture. Avoid using anything abrasive as this will scratch and damage your metal furniture. Some metals require special care see those below:
Aluminum Coated Furniture Cleaning Tips:
On aluminum coated furniture use non abrasive liquid cleaners. Remove scuffs by gently rubbing the area with a soft cloth covered with the cleaner and warm water. Rinse and dry with a soft cloth. If the powder coating is glossy you can apply a light coating of baby oil or a car wax to maintain the finish.
Stainless Steel Furniture Cleaning Tips:
Stainless steel requires a different approach especially with grease or smudges. These are easily cleaned with white vinegar on a damp cloth, once gone rinse and dry with a clean soft cloth to restore the stainless steel shine. Rust and corrosion are combated with a paste of baking powder and water. Scrub the mixture onto the affected area, in the direction of the grain of the finish, using a soft bristled brush, rinse with clean water and wipe off excess water and allow it to air dry. Water marks from hard water are easily removed with a cleaning followed with a good wipe down to remove excess water and allow it to air dry. Hard water hazing aka the white film can be cleaned with a mixture of 1:4 of distilled white vinegar and water. On galvanized steel use a mixture of 50/50 of distilled white vinegar and water to remove the white haze.
Wrought Iron Furniture Cleaning Tips:
Wrought iron can be the trickiest of all to clean due to the often ornate designs. Vacuum with a small brush attachment to remove dust and dirt. Use soapy water and a soft bristled brush to clean, a toothbrush can be used for small crevices in the intricate designs. Rinse well and wipe dry with a soft cloth. If there is damage to the finish follow these instructions to repair. Scrap to remove large flakes of finish, use a wire brush to remove small flakes and rust areas. Sandpaper any remaining rust off and smooth the rough spots in the finish for a sleek finished product. Clean thoroughly using the method above, allow it to dry. Use a rust proof primer to cover the exposed iron, followed with a few light coats of enamel paint. Once dry polish with a paste car wax and buff to a shine. Storage tip: Make sure your metal furniture and appliances are thoroughly clean and dry before storage to prevent mold, mildew or rust.
After properly cleaning your metal patio furniture it’s now time to store it. Typically your cushions should be cleaned and thoroughly dried before storing (see here for cushion cleaning). Stack your metal chairs if possible, protect any surfaces that can be scratched with plastic furniture wrap or an old blanket. Make sure where you store your furniture is dry as moisture will cause rust. Look into self storage as a great alternative to on site storage in your basement or garage. Cleaning before storage has a dual purpose, it prevents rust, mold and mildew during storage. Then next Spring you will be able to enjoy your metal patio furniture as soon as the first nice day arrives!
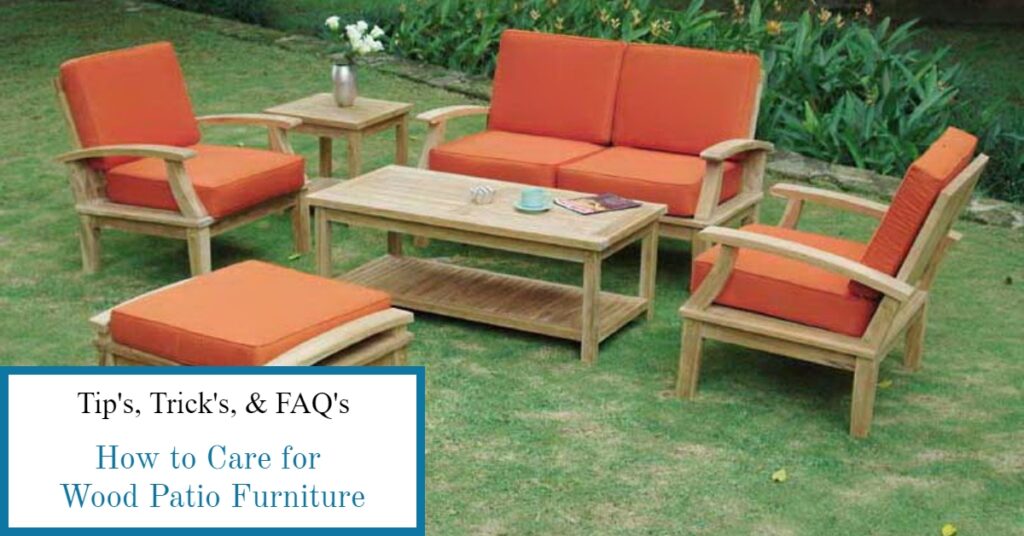
How to Care for Wooden Patio Furniture
Wooden patio furniture leads a rough life in the extreme Maine climate. Some woods high in oil are designed to withstand the worst Maine can throw at them and others are better suited for self storage to protect them. Depending on the wood type and what the desired goal is for your wooden patio furniture will dictate the type of care you choose for your furniture. Some wood like teak, meranti, baloui and ipe to mention a few are high in natural oil. These woods are designed to withstand years and years outside with minimal care. They will fade to a warm grey or reddish brown color over time. If that is your goal no extra care other than an occasional cleaning is needed, other wood types will require more care to maintain their natural glow. So how do you care for wooden patio furniture?
General Wooden Furniture Cleaning Tips:
Normal cleaning is easy for all wooden furniture, clean off surface debris with a soft nylon bristle brush then use a mixture of mild household cleaner on a sponge or cloth rag. Rinse, if required by the household cleaner, then remove any moisture with a lint free or microfiber cloth and allow to completely dry before storage. If you plan to maintain the natural brown color of your wooden furniture, treat your wood with furniture oil before storage or you can skip the oil and allow your furniture to gain the faded wood look.
If you oil your wooden furniture use an outdoor oil formulated with both resin and oil designed for outdoor furniture. A good brand will have heat stabilizers, UV and mildew inhibitors great for extra protection for your wooden patio furniture. Outdoor oil can easily be used over exterior oil paints, clear coats or stains for added protection. When you notice signs of wear on the finish, clean the surface and apply the outdoor oil without any need for sanding. The added oil will bring that luster of new wood back to a much loved outdoor wooden piece. No cleaning tips would be complete without touching on the cushions used to create your patio space. Keep the cushions bright with proper cleaning and storage tips found here.
High Oil Wooden Furniture Cleaning Tips:
Teak, meranti, baloui, shorea, jarrah, eucalyptus, ironwood, Brazilian walnut, pro lope and ipe woods are all oil rich wood that require a different care aside from regular cleaning. Due to their natural oil content they are strong and weather resistant. Eucalyptus and jarrah wood have the least amount of natural oils and require the use of a good outdoor oil and 2 to 3 layers of sealant to prevent cracking and should be dried off after a rainfall to help maintain their natural glow. To keep them looking great, eucalyptus and jarrah need to be kept in the shade to protect them from UV ray breakdown of the wood.
Teak, meranti, baloui, and shorea will naturally weather to a warm silvery gray over time. If you would like to keep the natural warm golden honey color of teak it should be sealed after 2 to 3 weeks of being weathered outside. Clean the teak, allow it to thoroughly dry and then apply a thin layer of sealant, allow it to dry for an hour and then apply a second coat of sealant, wait 5 hours before using the furniture. Only oil teak if it is to be used inside, oiling teak used outside will more likely mildew over time.
Meranti, baloui and shorea have very high oil concentration in the wood making it rot and insect resistant. To keep the warm reddish-brown color, oil the wood every few months with teak or linseed oil. These woods can also be sealed to keep their glow.
Ironwood, Brazilian walnut, pro lope and ipe woods are three times harder than teak. Kept outside these woods will go from dark brown to pewter gray. Light cleaning will suffice for this extremely durable wood. However, if you do need to deep clean these woods you can use a stiff brush and mild soap and water to clean, then rinse and allow to air dry. Allow furniture to age 30 to 60 months before oiling to keep the dark color. You can also sand the surface to remove any stains and no need to use any sealant to keep this wood looking new.
Mold and Mildew on Wooden Furniture:
Wooden furniture requires a different approach to mold and mildew removal. If after a normal cleaning the mold or mildew is still evident then utilize the following solution. Use 1 gallon of warm to hot water, add 1 cup of ammonia, ½ cup of white vinegar, and a ¼ cup of baking soda. Sponge onto the mold and mildew scrub with a soft bristled brush until the stain is gone, rinse and allow to air dry. For stubborn stains a light sanding may be required with a fine grained sandpaper. After sanding oil the furniture or reseal to protect the wood.
Storage Tips:
Storing wooden patio furniture for the winter will depend on the type of wood used for your furniture. Woods high in oil with the exception of Eucalyptus and Jarrah can be stored outside unprotected. All other woods should be cleaned and dried thoroughly before being stored. Self storage offers climate control to protect your wooden furniture from extreme temperatures that can cause damage. Wooden Patio Furniture that has been stored improperly will show signs of crazing which is fine lines and cracks in the finish. This can crack and peel off leaving your patio furniture exposed to the ravages of the elements. Keep your investment protected with proper care and storage!
Recent Comments